HOW TO: Update Dell BIOS with Top 3 Dell BIOS Update Utilities in Windows 7/8/8.1/10
Top 3 Dell BIOS Update Utilities to Update BIOS in Windows 7/8/8.1/10
“Hey guys, I have a Dell notebook running Windows 10. Anyway, my problem is that I need to update the BIOS. I download the executable to ‘flash’ update my BIOS from dell.com but it crashes. Does somebody know what I can do to update the Dell BIOS?”
-from Tom’s Hardware Forum
BIOS is the acronym that stands for Basic Input Output System. It is the first software your PC loads so that is able to use things like CD drives and keyboards practically from the moment you turn it on. Like OS and driver editions, the BIOS update includes feature enhancements or changes that may help to keep your system software compatible with other systems. What’s more, it offers security support and increases stability.
As for these reasons, we must to know the BIOS utilities and how to update it. In this article, we shall take Dell that is running Windows OS as an example to talk about the top 3 Dell BIOS update utilities and how to update Dell BIOS version in Windows 7/8/8.1/10.
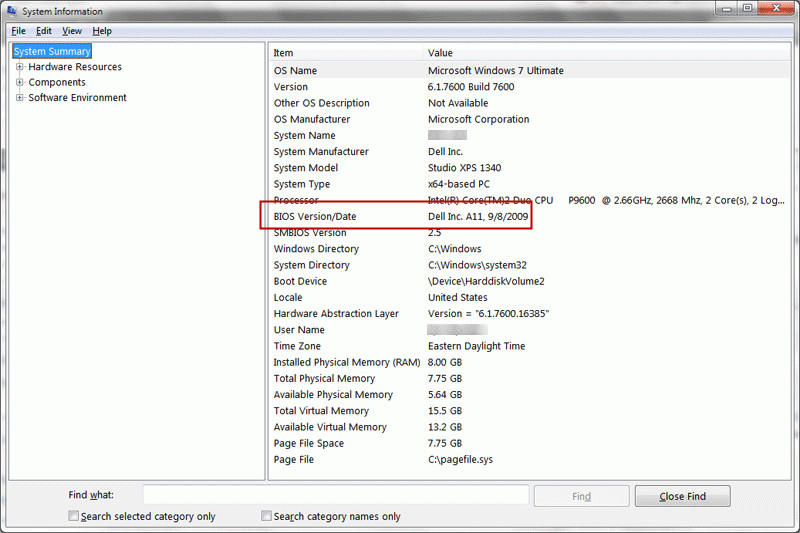
Before updating BIOS, you can check the Dell BIOS version from System Information in Windows by searching the Start Menu.
Top 1 - Dell Driver
We can’t emphasize the importance of updating BIOS too much. The first way to update Dell BIOS is to make use of Dell Driver. Dell Driver is provided by Dell official website.
How to use Dell Driver to update BIOS? The user steps are:
1. First of all, start Dell Windows-based computer and open a web browser on it. Then visit
http://www.dell.com/support/drivers
Then you have to click different buttons based-on your specific situation:
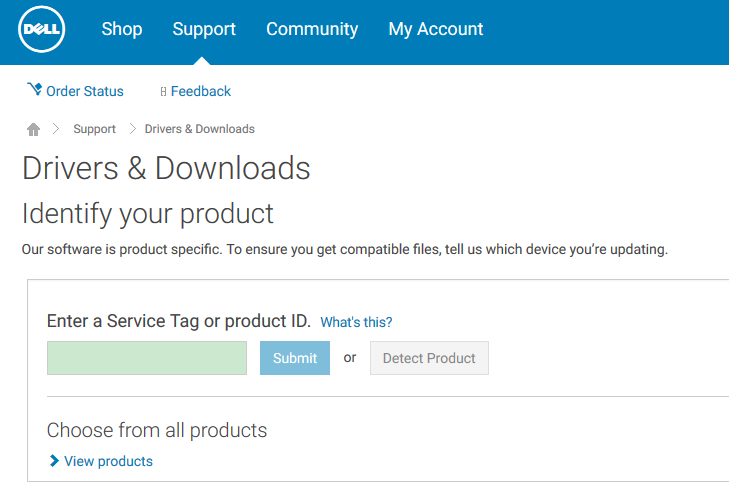
- Once you’re inquired to “Identify your product”, just to enter your Service Tag or product ID, or to choose “Detect product” button to let the server detects it.
- If the system shows it is wrong, you might have to tap the tab that says “Choose from all products” to find out the target Service Tag or product ID.
2. When the right system is elected, you need to tap on the tab “Find it Myself” and then read the page where it says “Refine your results”. In the scroll-down menu, select BIOS. This will improve the results to show the BIOS category only.
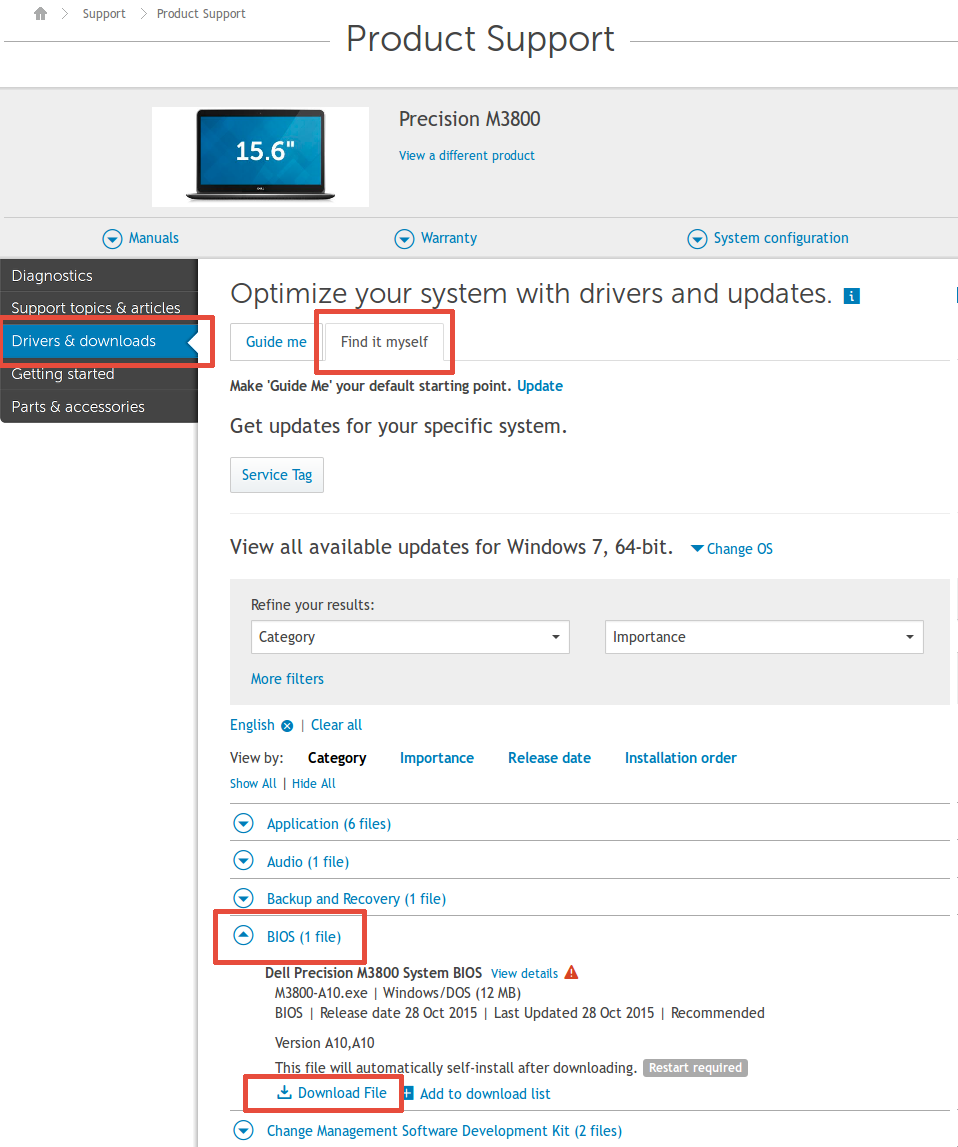
3. Once there is no less than one file listed, tap on “View details” on the most recent version of the BIOS. After that, tap on “Important Information”.
4. Once you are ready to update BIOS, no hesitate to click “Download File” and begin to download and save the file to your Dell computer. When it is downloaded, just double click the icon on your computer desktop.
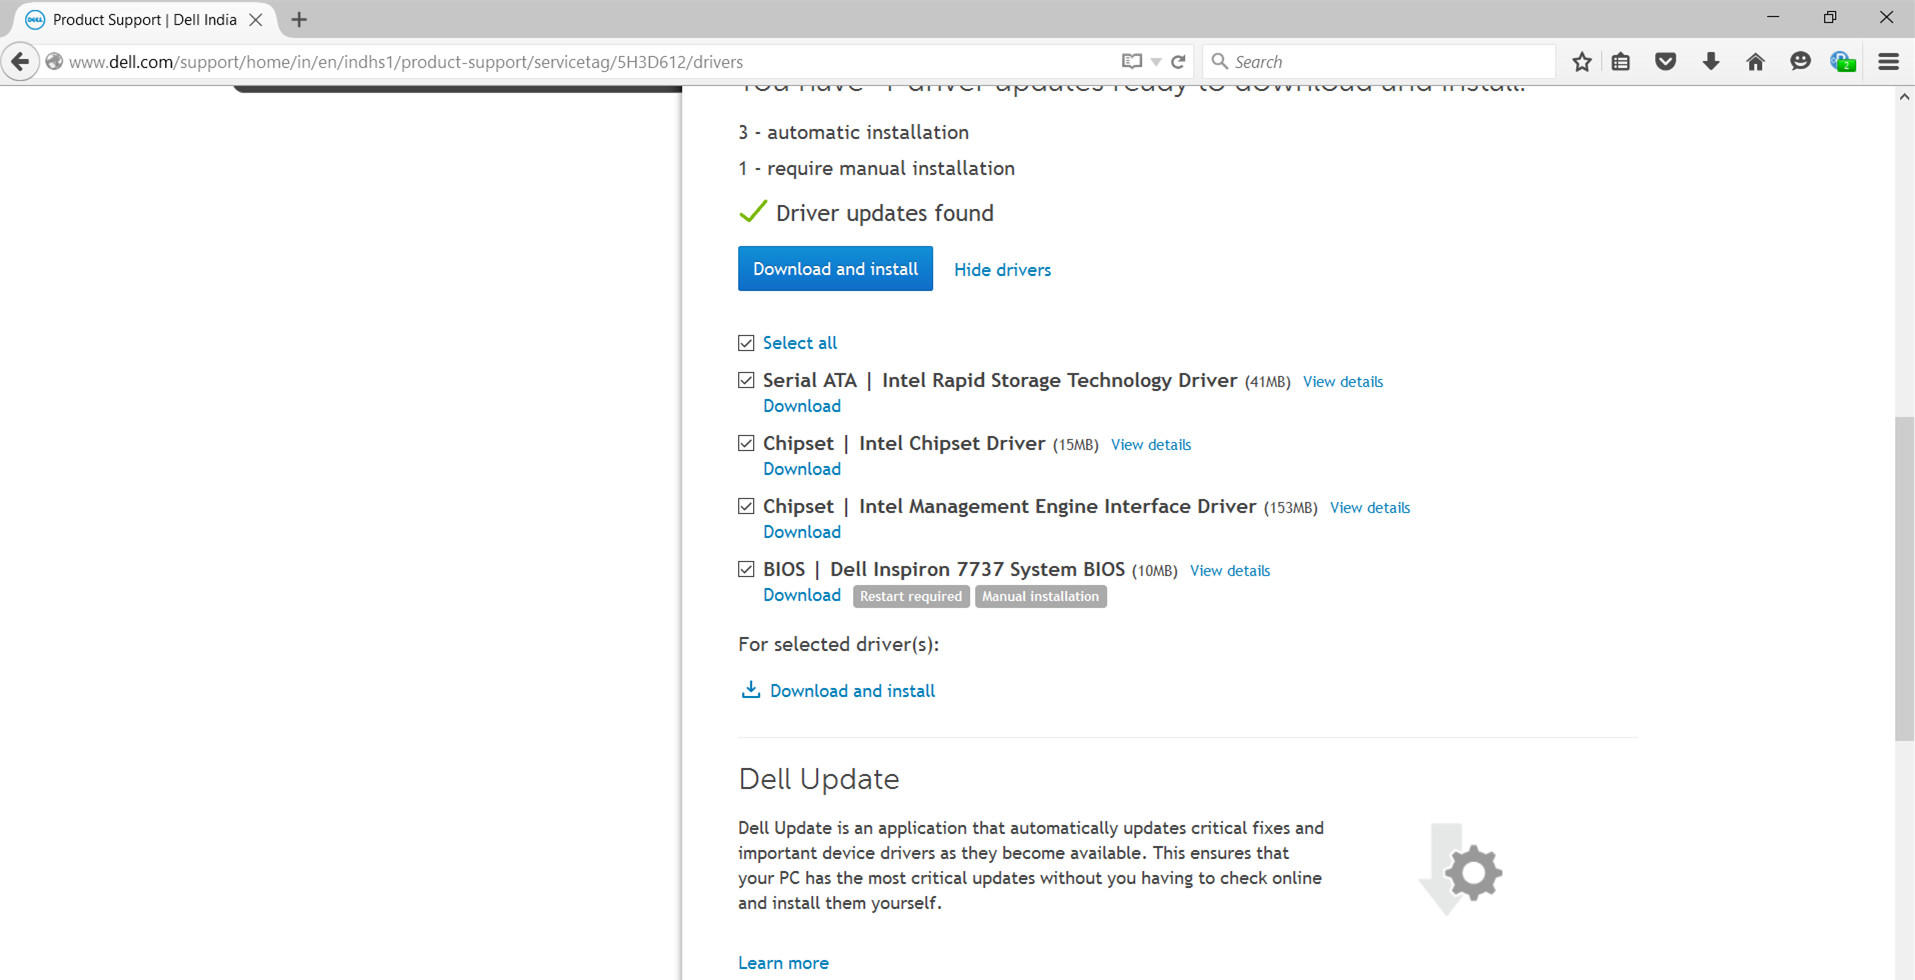
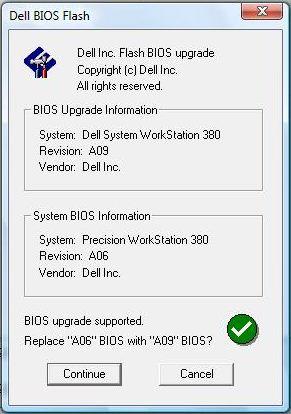
5. Follow the prompt on the screen and then to complete the installation. Click the “Continue” button and then it will reboot your system and perform a BIOS update.
Top 2 - BitLocker
Before updating BIOS on Dell PC that has BitLocker enabled, be sure that you suspend BitLocker encryption. If BitLocker is not suspended, the PC won’t accept your BitLocker key when you start it at the next time. In that case, you can only boot it with a recovery key always.
In order to keep away from that disaster, you had better suspend BitLocker before running the BIOS update utility for your Dell machine. Here’s how to use USB to update Dell BIOS:
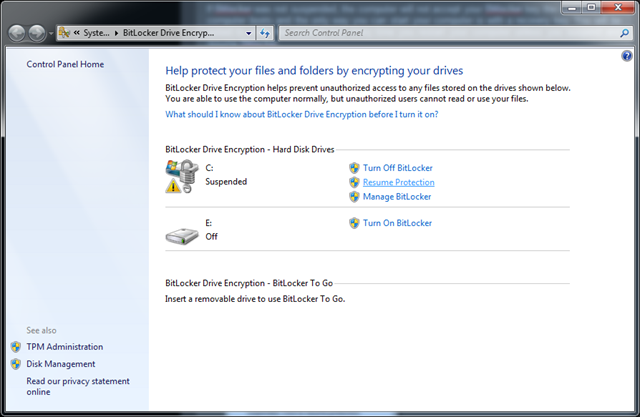
1. Start your Windows system normally and go to Control Panel > System and Security > BitLocker Driver Encryption.
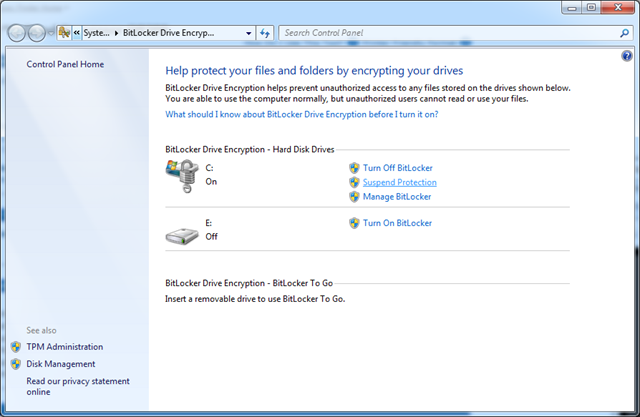
2. Select “Suspend Protection” and confirm it by taping on “Yes”.
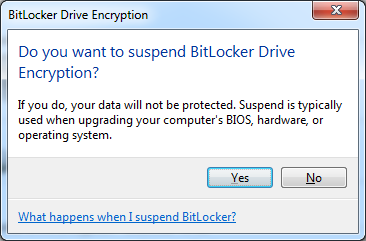
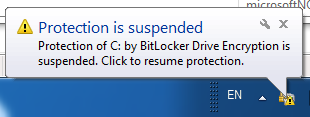
3. Continue and update the BIOS and then restart your PC. Then resume BitLocker after the restart via clicking “Resume Protection”.
Top 3 - USB Flash Drive
If your Dell system can’t load to Windows but you still have to update BIOS, just download the BIOS file with the use of the other computer and then use a bootable USB flash drive to finish it.
How to update Dell BIOS from USB flash drive? See the guidance as below:
1. Download Dell Diagnostic Distribution Package(DDDP) exe file on https://ftp.us.dell.com/diags/CW1322A1.exe from another PC.
2. Copy the file onto the bootable USB flash drive and then insert USB (at least 8GB) to the Dell computer that need to update BIOS.
3. Restart the PC and press F12 rapidly until you see the DELL logo and the screen shows “Boot Menu”.
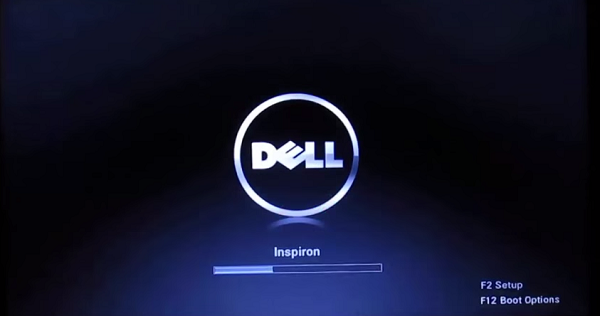
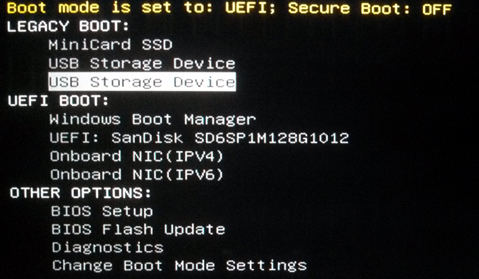
4. Use the arrow keys in the keyboard and choose “USB Storage Device” and press “Return”. The PC will lead to a C:\ hint.
5. Type the full filename such as xxxxx.exe, run it and then type “Return”. The BIOS Update Utility will load just like the below screenshot shows.
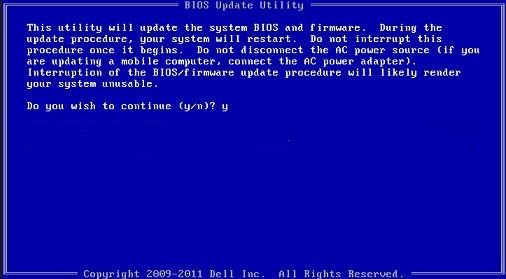
That’s all the information about these top 3 Dell BIOS update utilities in Windows 7/8/8.1/10. By the way, after updating BIOS version, if you can’t remember login password in Windows system, try to use Windows Password Key to reset or remove it. It supports all Windows operating system including Windows 10/8.1/8/7/Vista/XP, etc.
- Related Articles
- How to Reset Dell Windows Password
- How to Reset Dell Password on Windows 10 within Steps
- Top 2 Ways to Unlock Dell Inspiron Laptop without Password
