Top 8 Ways to Fix Windows 10 Won't Shut Down
Top 8 Ways to Fix Windows 10 Won't Shut Down
With all the latest update of Windows 10, Windows 10 not shutting down is a common problem for many users. In this piece of writing 8 ways are discussed to use when Windows 10 doesn't shut down.
- Way 1. Disable Fast Startup on Windows 10
- Way 2. Change Power Options in Power Management
- Way 3. Reset Your Power Plan to Default
- Way 4. Reset Your BIOS to Default
- Way 5. Perform A Full Shutdown
- Way 6. Update Intel Management Engine Interface Driver
- Way 7. Fix PC Won't Shutdown With Windows Troubleshooter
- Way 8. Disable Intel Rapid Technology Service
Way 1. Disable Fast Startup on Windows 10
Fast startup is a new feature of Windows operating system. This option does not let the PC go under complete shutdown. It makes the PC go to a transient phase between shutdown and hibernation, so that the PC can be turned on quickly. But this creates many shut down problem later so to disable it follow these steps as mentioned below.
● Press the "R" button from the keyboard along with the Windows key to launch "Run".
● In the "Run" box type in "control panel" and press "Enter" from the keyboard or click on "OK".
● Type in the search bar "power options" and search for the same. Click on "Power Options"
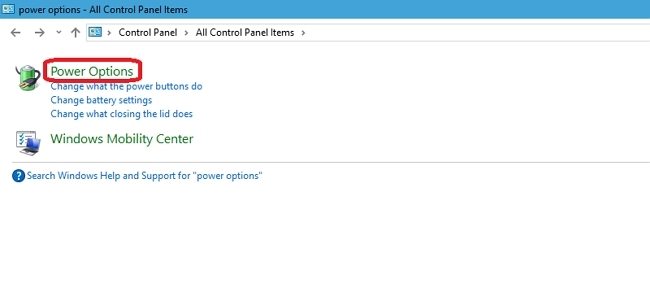
● Locate "Choose what the power button does" in the left panel and click on it
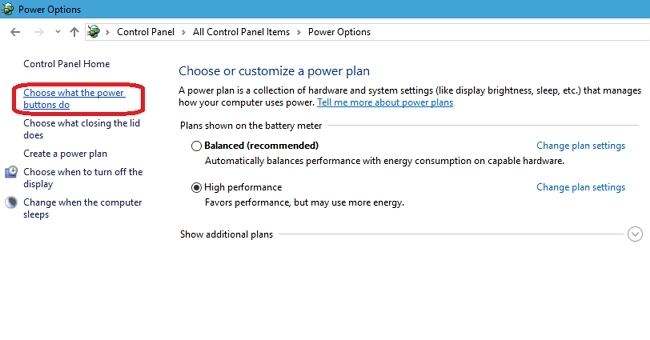
● Click on "Change settings that are currently unavailable". Locate the box beside "Turn on fast startup" and click on it to uncheck it
● Click on "Save changes" to save the changes made.
Way 2. Change Power Options in Power Management
Sometimes power options are the main culprit behind shut down failure. Follow these simple steps to change the power options in Power Management and fix the issue.
● Press "R" from the keyboard along with Windows key to launch the "Run". Type "powercfg.cpl" in the text field and press "Enter" from the keyboard
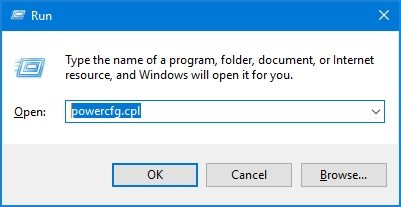
● In the power options choose any other plan available than the current one. Click on "OK" to save the changes afterwards.
Way 3. Reset Your Power Plan to Default
Sometimes the power plan set for the laptop. Resetting the power plan is the remedy to this problem. To apply this remedy follow these steps.
● Launch "Run" box. In the "Run" box type in "control panel" and press "Enter" from the keyboard or click on "OK".
● Type in the search bar "power options" and search for the same. Click on "Power Options".
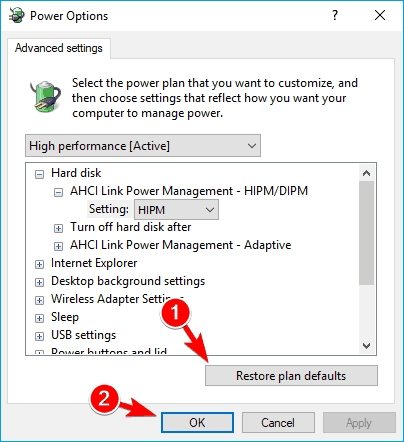
● Go to current power plan. Look for "Change plan settings" option and click on it. Then click on "Change advanced power settings".
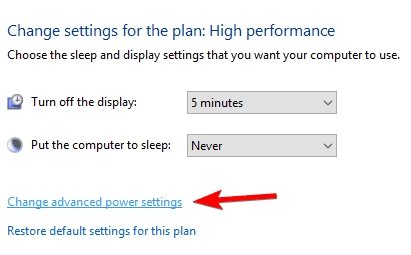
A pop up will come up. Locate "Restore plan defaults" and click on it Then click on "Apply" and then on "OK" to save the changes.
Way 4. Reset Your BIOS to Default
Sometimes the reason behind the why the PC is not shutting down is BIOS related. In this case resetting the BIOS to default settings is the best method to use. Follow these steps with utmost care and precaution as any damage to the BIOS can lead to damage to the PC. The steps to reset the BIOS is as follows.
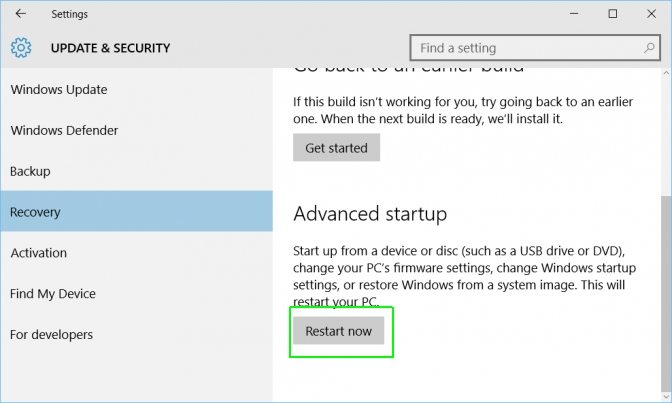
● Launch "Settings" and click on "Update & Security". Click on "Recovery" option in the left panel. Click on "Restart now" options in the next window within "Advanced startup".
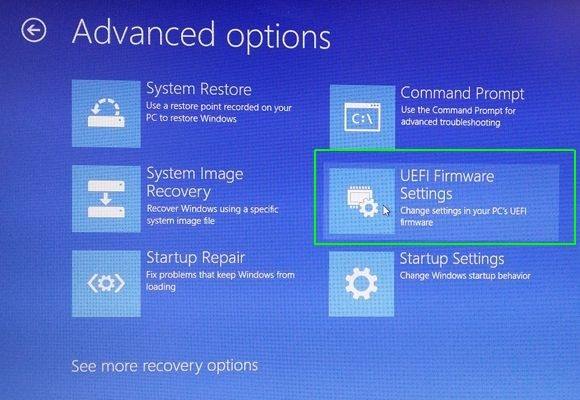
● Click on "Troubleshoot" in the next window. In the next window select "Advanced options" and then click on "UEFI Firmware Settings".
● Restart the PC to enter the UEFI (BIOS). Once you're in, you might see a key at the bottom that says Setup Defaults — F9 on many PCs. Press this key and confirm with Yes to restore the default BIOS settings.

The BIOS should now be turned in to the factory set.
Way 5. Perform A Full Shutdown
Performing a full shut down is one of the most efficient ways to resolve this problem. Follow these steps to achieve the full shut down of the PC.
● Make a right click on anywhere of the free space available on the desktop. Move the cursor to "New" option in the drop down menu. Click on "Shortcut" in the pop up.
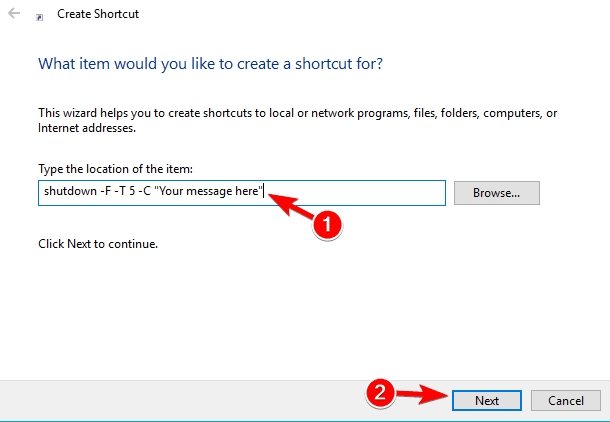
● Now type in the following line "shutdown -F -T ## -C "the message here"". In this command replace "##" with any number within the range of 0 to 315360000 and replace the "the message here" with any text. Click on "Next".
● Put a name of the shortcut like "shutdown.exe" or anything else. Click on "Finish".
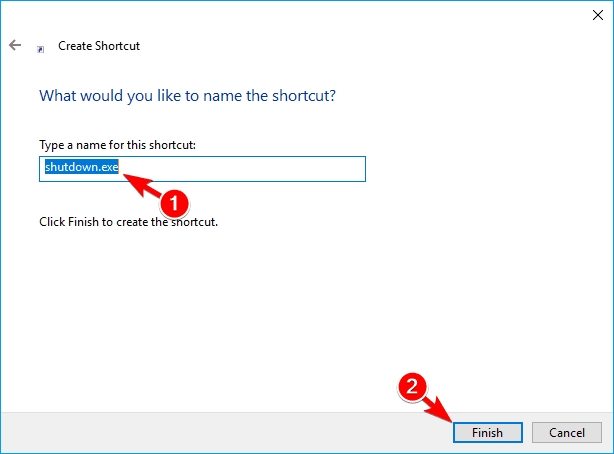
Now double click on the shortcut to shut down the PC completely.
Way 6. Update Intel Management Engine Interface Driver
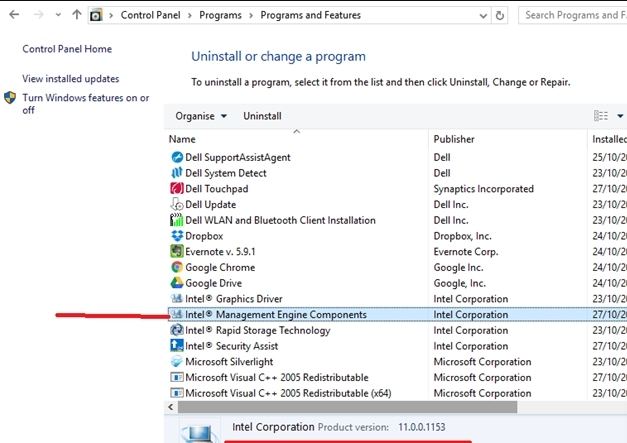
Backdated Intel management engine interface driver may be the reason behind the failure of PC shutdown. Just use these steps as a way to update the same.
● Launch "Device Manager". Click on "+" beside the "System devices" category to expand it.
● Make a right click on "Intel Management Engine Interface". Choose the "Update driver".
Way 7. Fix PC Won't Shutdown With Windows Troubleshooter
Using windows trouble shooter is the next thing to use if all the previous methods have failed to resolve the issue. Follow these steps as mentioned below.
● Type in "Troubleshoot" in the start menu and search for it. Then click on "Troubleshoot" from the search results.
● Click on "Run the troubleshooter" under "Windows Update" option.
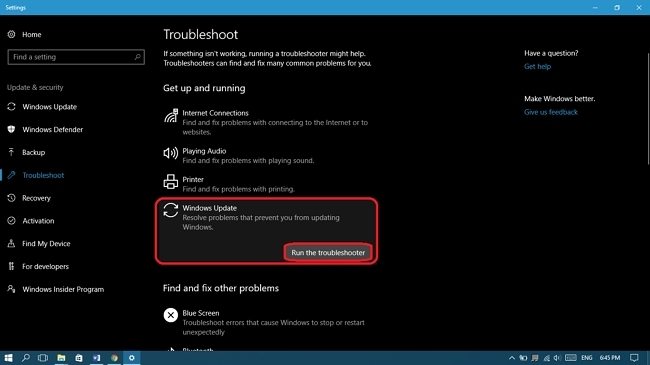
● A window will pop up, click on "Apply this fix" in this window. Now close the trouble shooter after the fix is done.
Way 8. Disable Intel Rapid Technology Service
Sometimes Intel Rapid Technology Service is the reason behind the shutdown failure. Follow these steps to resolve this issue.
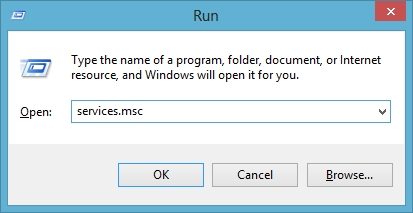
● Launch "Run" box. In the text field of Run type in "services.msc" and press "Enter" from the keyboard.
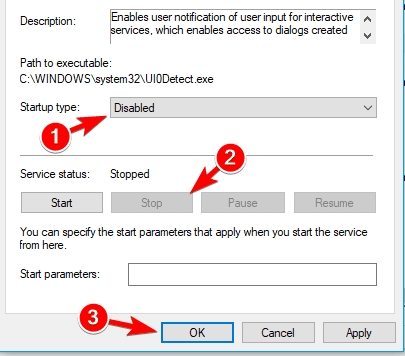
● A services window will appear find "Intel Rapid Technology" and make a double click on it. Put the "Startup type" as disabled.
● Click on "Stop" for stopping the service and restart the PC.
So these were the top 8 ways to fix the shutdown problem of Windows 10. For other booting related issues a powerful tool named as Windows Boot Genius can be used.
- Fix all booting issues, like Blue/Black Screen of Death, freezing, crash.
- Selectively backup and restore disk and partitions.
- Create, format, delete or resize partitions freely.
- Wipe sensitive data from any specific folder or partition permanently.
- Fully support Windows 10/8.1/8/7/Vista/XP.
- Related Articles
- Top 2 Ways to Fix Corrupted Windows 10 MBR
- Top 3 Ways to Fix BOOTMGR Missing on Windows 10
- How to Factory Reset Windows 10 without Password
