How to Activate or Deactivate System Cooling Policy in Windows 10
How to Activate or Deactivate System Cooling Policy in Windows 10
This article what is the cooling system policy in Windows 10 and whether system cooling policy Windows 10 is good or bad, thus you can choose activate or deactivate system cooling policy according to your need.
Part 1: What Is System Cooling Policy in Windows 10?
Part 2: System Cooling Policy — Active or Passive?
Part 3: How to Change System Cooling Policy for Processor Power Management in Windows 10?
Part 4. System Cooling Policy Missing in Power Options, How to Fix?
Part 1: What Is System Cooling Policy in Windows 10?
The system cooling is a vital part for sound operation of the PC. Uncontrolled warming of the parts can damage the hardware and eventually the PC may get destroyed. Windows 10 system cooling makes sure that the PC part does not get heated more than the specified value. The mode of operation for the system cooling in Windows is of two types that are known as active cooling or passive cooling method. More has been discussed in the due length of this article to answer what is system cooling policy more effectively.
Part 2: System Cooling Policy — Active or Passive?
The two system cooling policies are active and passive cooling. The critics are always fighting over the topic of which one is better between system cooling policy active or passive. Let's find out the modulus operandi of the two systems first.
1. Active system cooling:
The cooling fan is used in this procedure. This process of system cooling makes the processor run slowly while speeding up the cooling fan. Although the slowing down of the processor is not noticeable in the operations of the PC, it slows down. A little bit of noise is there too due to fan rotation. This method is used for constant cooling of the system by rotating the fan at constant heat situations
2. Passive cooling system:
The cooling fan is redundant in this method. This method of cooling slows down the speed of operation of the part which is heated and let it cool down. This method starts only when the heat has crossed the limiting value by a large margin.
In the usual case, a combination of both of these methods is used to cool down the PC. But the combination does not work as both of them being used at the same time. Even the user can select the preferable mode of cooling to be used. If active cooling is chosen as the preferable, i.e., the first option then passive cooling will be used if the heat is too much to be handled by only active cooling. Same goes for the approach of selecting passive cooling.
Part 3: How to Change System Cooling Policy for Processor Power Management in Windows 10?
As mentioned in the previous part that the user can opt for which system cooling he or she wants to use the first option. After the choice has been made about what to choose between active cooling vs. passive cooling follow these steps to alter the settings in power management in Windows 10.
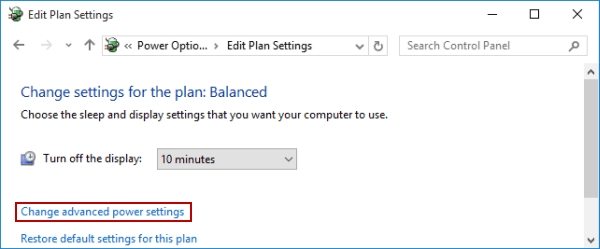
1. Launch advanced power plan settings on the PC.

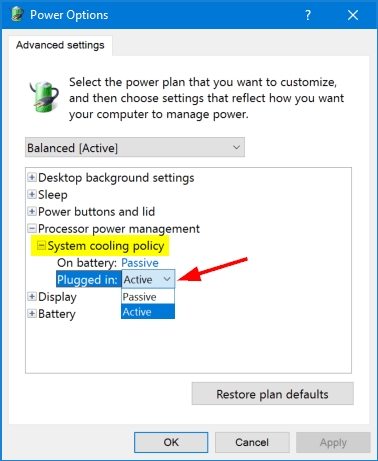
2. Click on the positive sign before the "Processor power management" to expand it.
3. In the expanded menu locate "System cooling policy" and click over the positive sign before it to expand it as well.
4. In the expanded menu choose the method of active or passive whatever cooling system is decided to be used for cooling.
5. The user can also choose in which power supply the method to be used between power from "on battery" or "plug-in."

6. Click on "OK" for making the changes permanent.
Part 4. System Cooling Policy Missing in Power Options, How to Fix?
Sometimes system cooling policy seems to be missing in the Windows. If the system cooling policy could not be found in control panel within the Power Options, then it may be the fault of registry settings. Follow the steps to correct the registry settings.
1. Press "R" from the keyboard along with Windows key to launch Run.
2. In the "Run" box type in "notepad" to launch the notepad

3. Type in the following code in it or rather copy pate it in the notepad:
Windows Registry Editor Version 5.00
[HKEY_LOCAL_MACHINE\SYSTEM\CurrentControlSet\Control\Power\PowerSettings\54533251-82be-4824-96c1-47b60b740d00\94D3A615-A899-4AC5-AE2B-E4D8F634367F] "Attributes"=dword:00000002
4. Save the file as .reg file.
Image source: reg-file.jpg Alt name: reg file
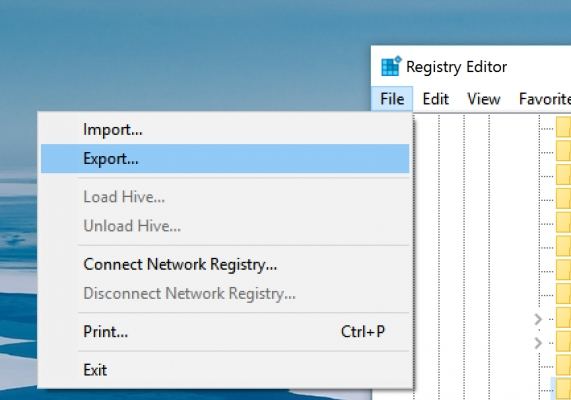
5. Make a double click on the .reg file for importing the settings to the registry. Click on "Yes" to confirm.

6. Now open the control panel to access the system cooling policy.
7. If the policy option is to be removed then follow the same procedure only put the below-mentioned code:at the place of the above one
Windows Registry Editor Version 5.00
[HKEY_LOCAL_MACHINE\SYSTEM\CurrentControlSet\Control\Power\PowerSettings\54533251-82be-4824-96c1-47b60b740d00\94D3A615-A899-4AC5-AE2B-E4D8F634367F] "Attributes"=dword:00000001
Sometimes, system cooling issues may be related to various booting issues as well. In this case, you need a professional tool to fix your computer. Fortunately, there is a booting software named as Windows Boot Genius, to fix all booting issues including computer crashes, blue screen, random restarts, can't boot, and other Windows are booting problems as well.
- Fix all booting issues, like Blue/Black Screen of Death, freezing, crash.
- Selectively backup and restore disk and partitions.
- Create, format, delete or resize partitions freely.
- Wipe sensitive data from any specific folder or partition permanently.
- Fully support Windows 10/8.1/8/7/Vista/XP.
- Related Articles
- https://www.4winkey.com/windows-10/how-to-open-registry-editor-in-windows-10
- Windows 10 Keeps Asking for Login User Password, How to Fix It
- Windows 10 Password is Incorrect, How to Fix it
