How to Disable Windows 10 Lock Screen
How to Disable Windows 10 Lock Screen
Windows 10 is no doubt one of the most used operating systems in the world right now. It is now being used on over 700M devices according to the announcement made by the Microsoft officials at the recent Build developer conference. With such a huge number of users, the O.S. still possess faults. One of the most hated problems is the lock screen and the login screen. The procedure to disable Windows 10 lock screen is different for different editions of Windows 10. The route to turn off lock screen Windows 10 is same for Enterprise and Education edition of Windows 10, but it is different for Home edition of Windows 10.
Part 2. Turn off Windows 10 Lock Screen in Registry (For Home Edition)
Extra Tip: How to Disable Windows 10 Login Screen without Password
Part 1. Disable Windows 10 Lock Screen using Group Policy Editor (For Enterprise and Education Edition)
This method deals with how to turn off lock screen Windows 10 of Enterprise and Education Edition via group policy editor. The user should follow the below-mentioned steps to remove lock screen Windows 10 –
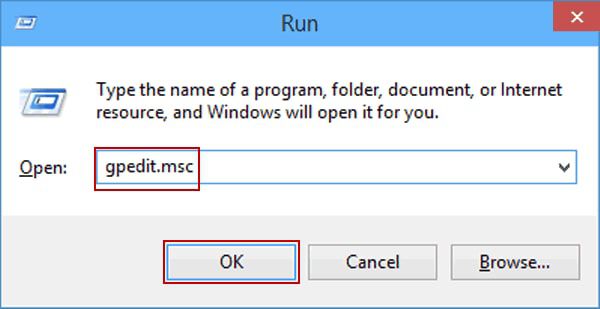
1. First, open the group policy manager. For this press the windows key with R form keyboard, a pop up will come on the screen there put "gpedit.msc" command, and by doing so the group policy manager will be launched. Another way of achieving the launch is to directly launch it from the start menu by typing "group policy."
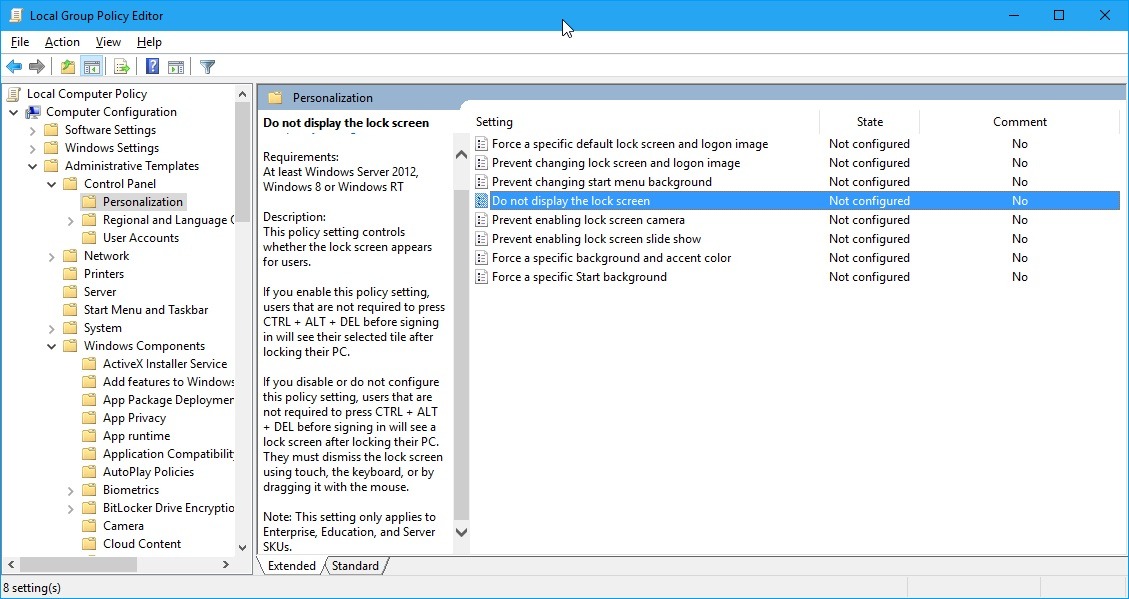
2. Then launch the personalization window from the control panel. The control panel can be launched from administrative templates of configuration.
3. In the personalization window, locate the "Do not display the lock screen" option and double-click on it. Then select the enable box. After that clock on "Apply" and then "Ok."
4. Then for the final step restart the computer. After restarting the user will see his or her selected tile on the PC.
Part 2. Turn off Windows 10 Lock Screen in Registry (For Home Edition)
This method is for the Home edition of Windows 10 for removing the lock screen of the PC via the registry. By making some changes in the registry, the lock screen can be easily disabled for the Windows 10 Home edition. For so the user should follow the below-mentioned steps –
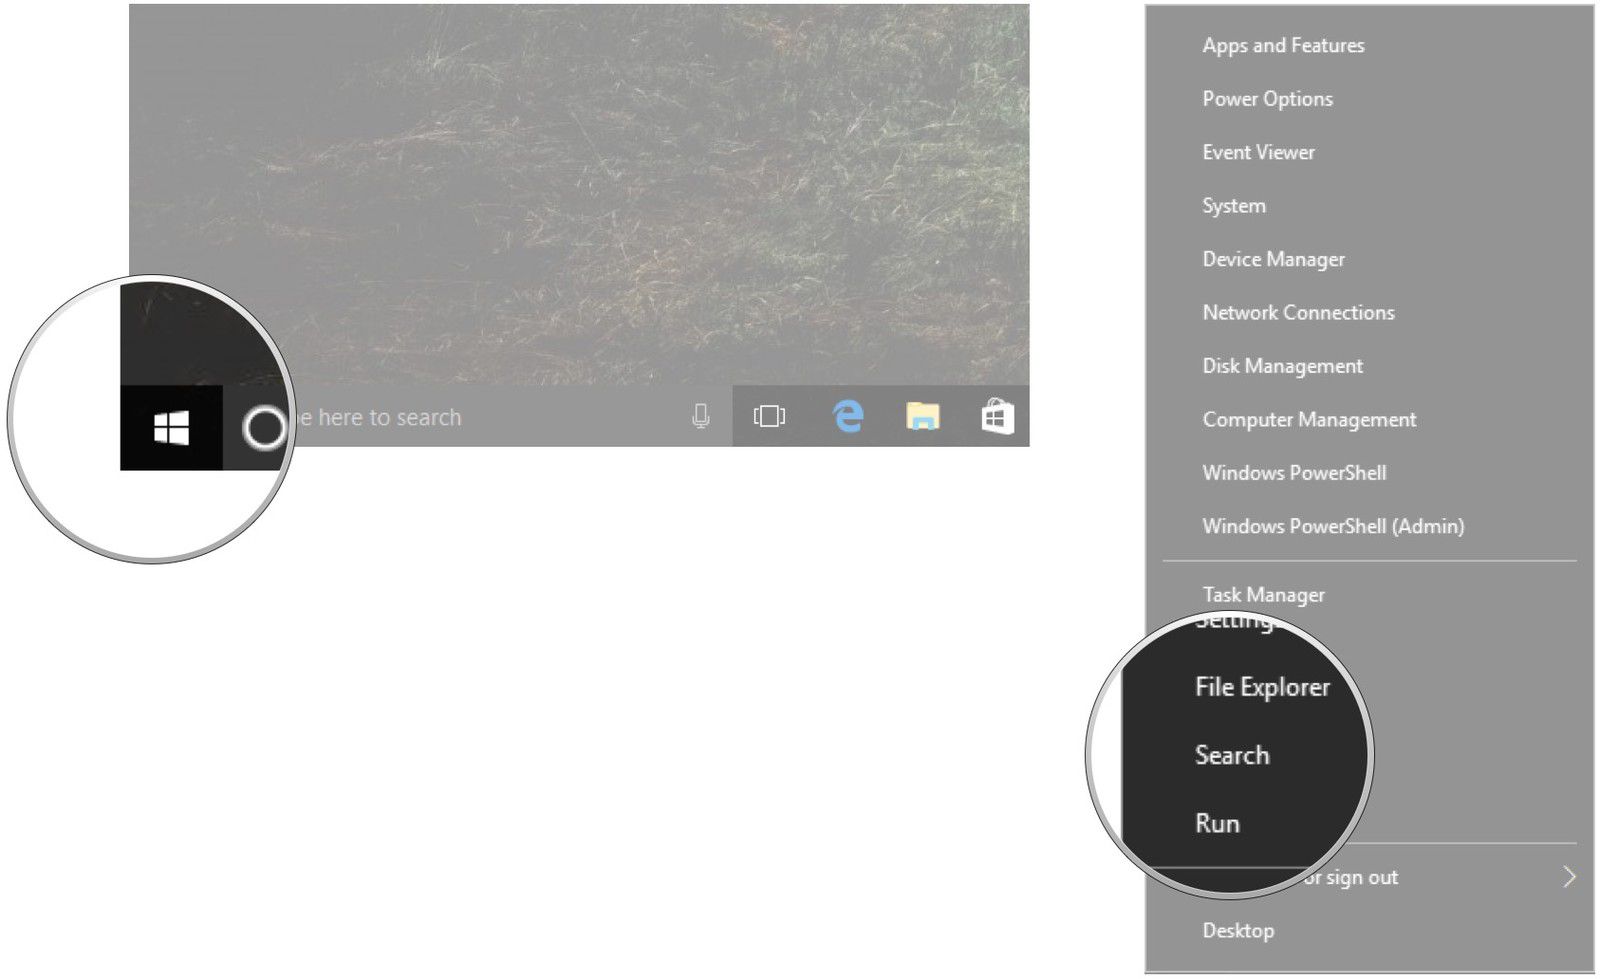
1. First, make a right click on the start button of the PC. After doing so go for search.
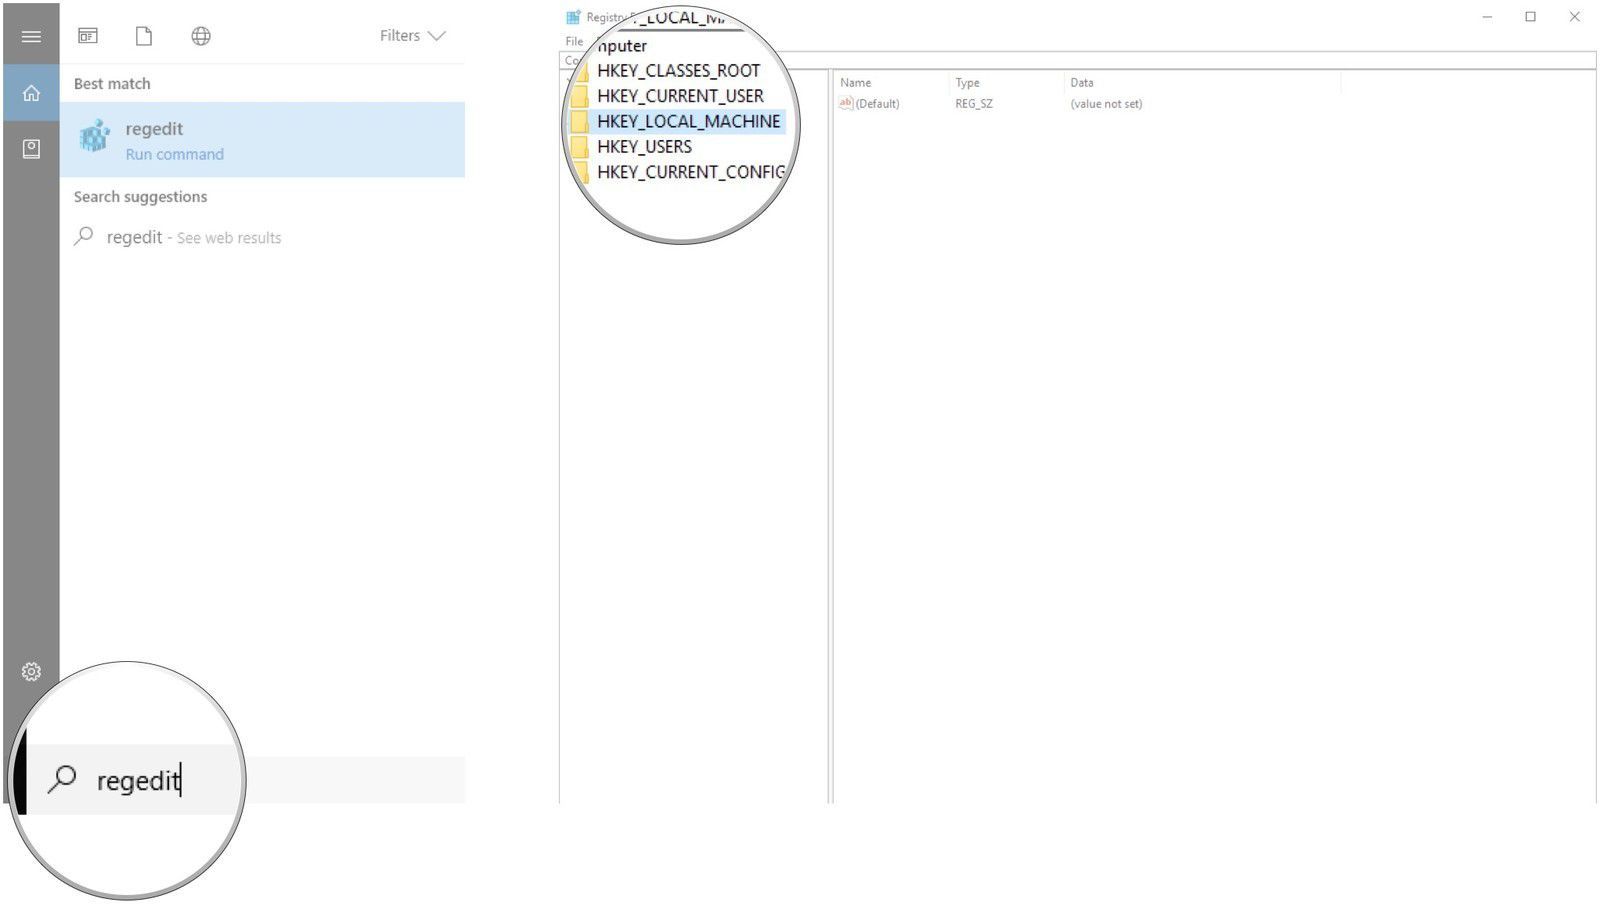
2. In the search window type in “regedit" and then press enter from the keyboard.
3. Then double-click on the "HKEY_LOCAL_MACHINE," after doing so again double click on the "software" option.
4. Then double-click on "Policies" option.
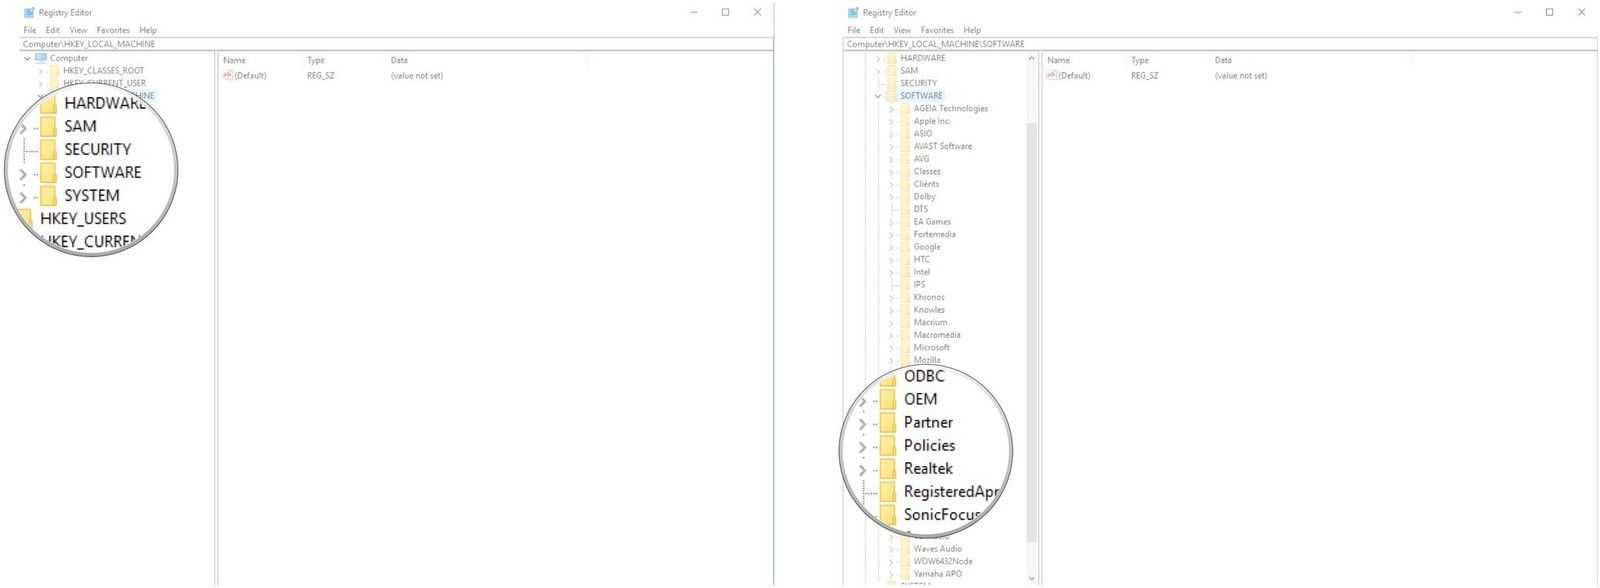
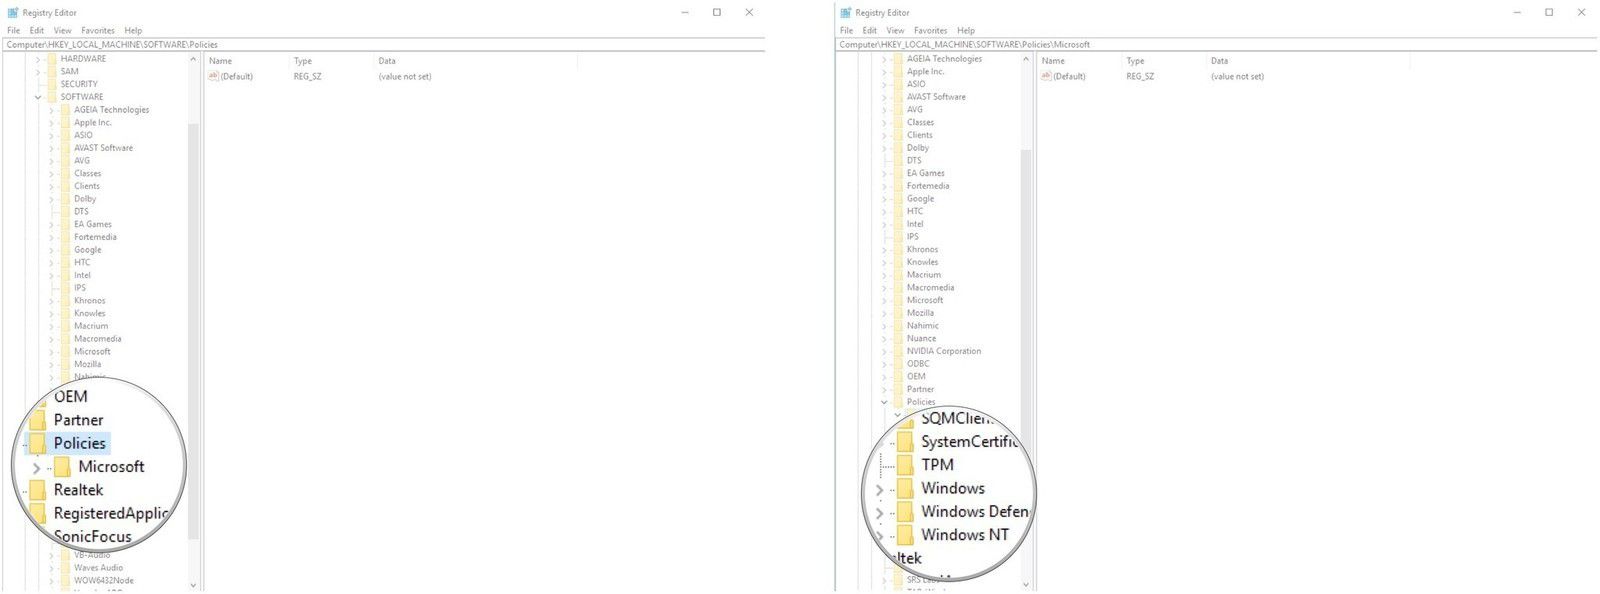
5. Then double-click on the "Microsoft" option. Here comes the end of double-clicking.
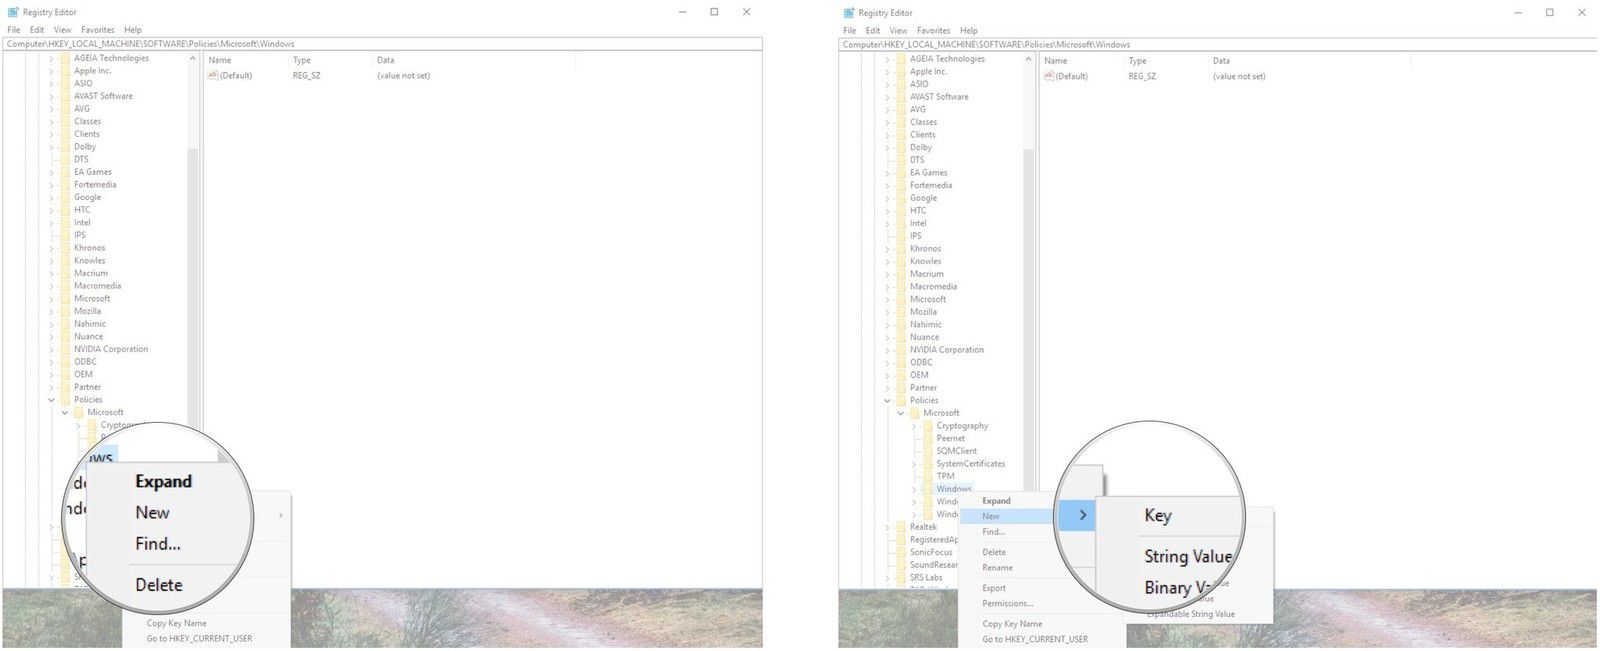
6. Now make a right click on "Windows" choice. After that click on "New."
7. Then click on “Key” option.
8. After doing so, type in “Personalization” in the window popped up and then press enter from the keyboard. By doing this, a key named as "Personalization" will be created in the registry.
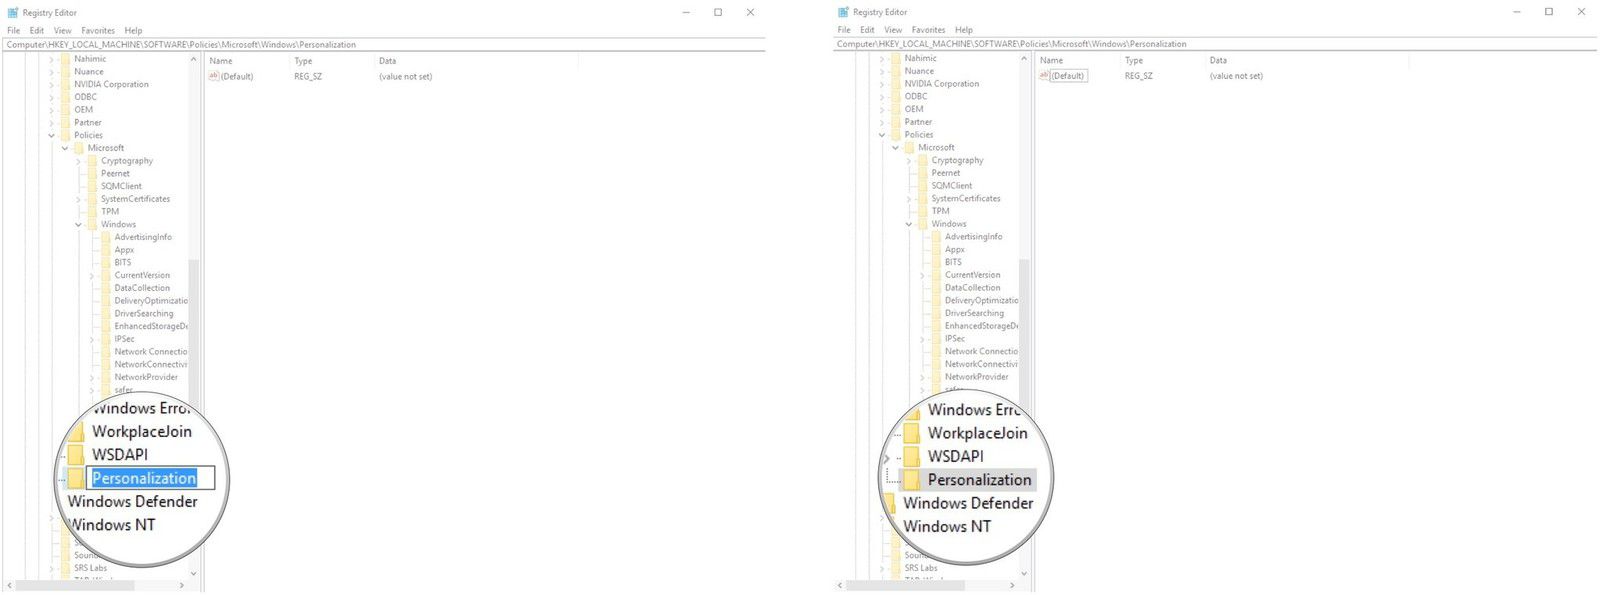
9. Then again make a right click on the “Personalization” key just made.
10. Then click on "New" option and then click on the "DWORD(32-bit) Value."
11. Then type in the box “NoLockScreen” and press enter form the keyboard. A DWORD named as “NoLockScreen” will be created.
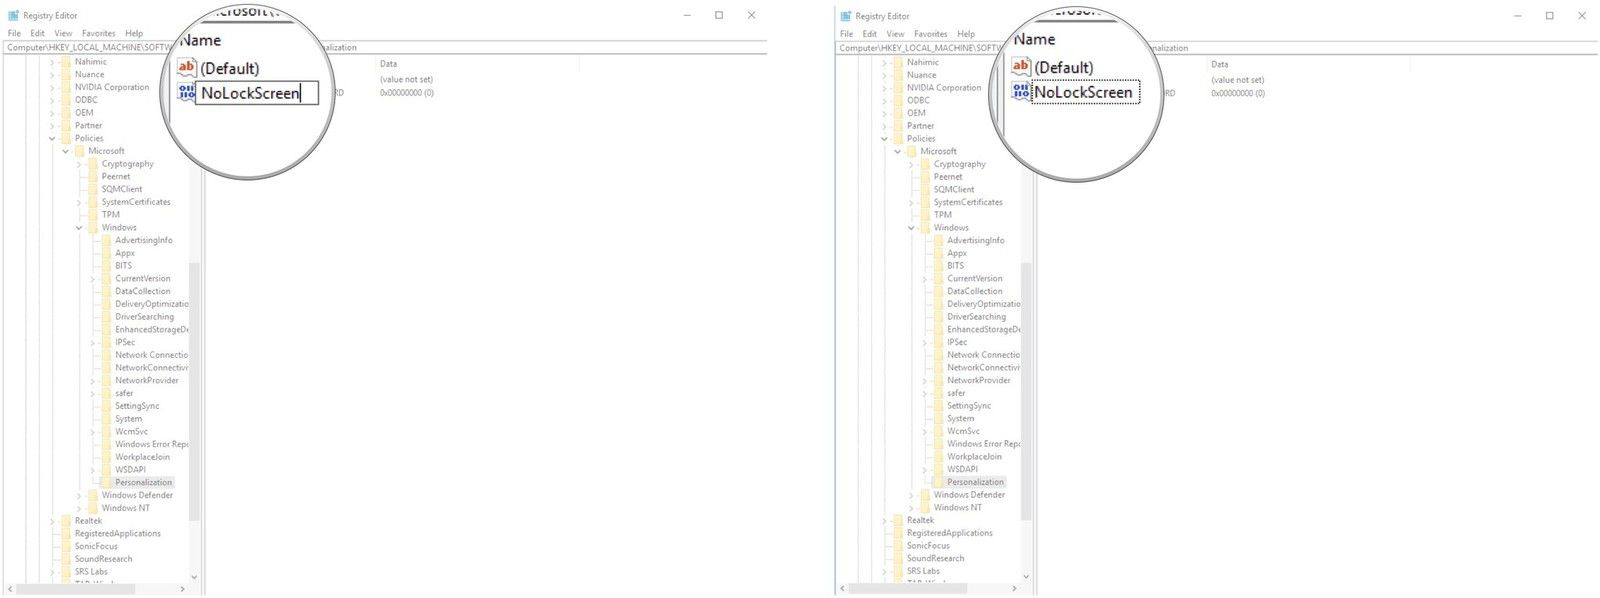
12. Then double-click on the recently created DWORD named "NoLockScreen."
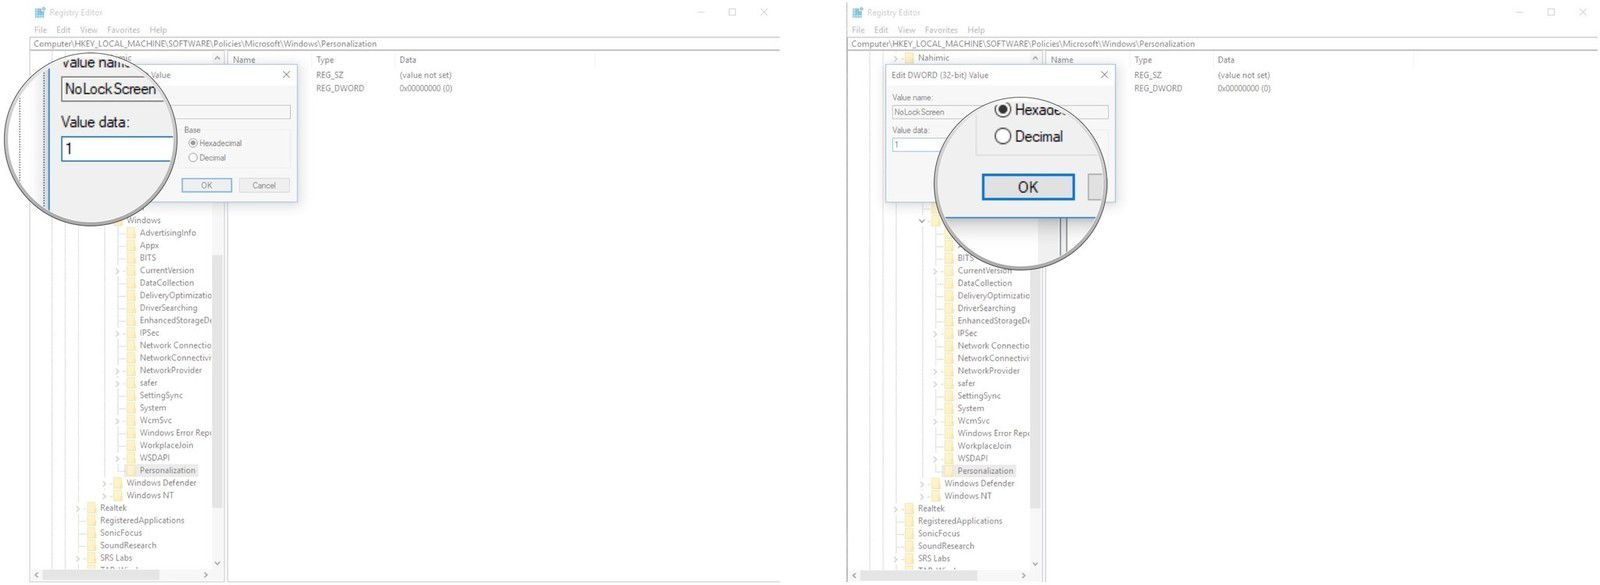
13. Now in the "Value data" field if the user puts 1 and then click on "Ok" then the lock screen will be removed. To restore the same user need to change the "Value data" field to 0 in the same process.
This process is indeed tiresome but not a difficult one, that’s for sure.
Extra Tip: How to Disable Windows 10 Login Screen without Password
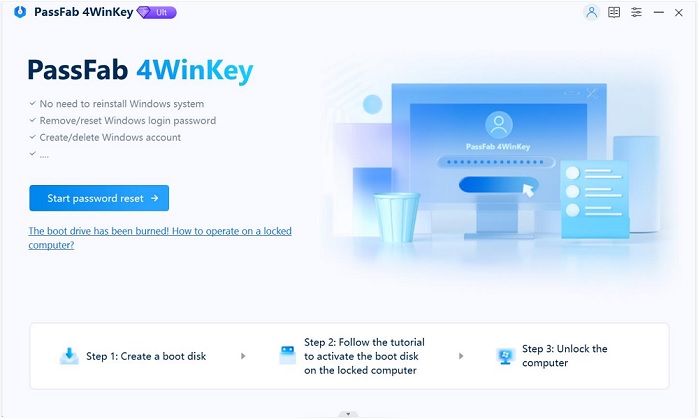
Forgetting the password may give the user a lot of trouble in logging in his or her PC. The best way to deal with this problem is to disable Windows 10 login screen; this can be done easily by using the Windows Password Key Standard software. By using this software, the user can remove windows 10 login password as mentioned below –
1. First, run the application 4WinKey in any computer you can access. Then click on "Browse" for selecting the right 4WinKey image file.
2. Attach an empty USB flash drive to the PC and select the same from the pull-down list of the software.
3. Then burn the program on the USB flash drive. After the process is completed click on “Ok” option and drive out the USB.
4. Now insert the USB drive into the PC which is password protected and reboot the later from the USB. For achieving so press F12 from the keyboard to get to the boot menu. From the boot menu, pull-down list selects the USB flash drive and press enter.
5. Then type in the ID number of the protected windows installation. To continue or quit the process put 0 in the selection part.

6. Enter the number of the required password-protected account and then press enter.
7. After pressing enter, a confirmation question will come up, type in "y" as the answer to proceed or "n" to stop.

8. Now remove the USB and restart the PC.
So, these were the steps for treating the login screen or lock screen problem of Windows 10 different versions.
Watch the Video on How to Bypass Windows 10 Admin Password
- Related Articles
- How to Create Windows 10 Password Reset USB/CD with ISO
- 3 Best Ophcrack Alternatives for Windows 10
- How to Fix “Windows 10 Domain Username or Password is Incorrect” Error
