How to Migrate Windows 10 Tablet from 32-bit to 64-bit
How to Migrate Windows 10 Tablet from 32-bit to 64-bit
Summary: Here we elaborate all you need to know about migrating Windows 10 tablet from 32 bit to 64 bit, including what you need to prepare and how to upgrade to Windows 10 (x64) from 32 bit.
Microsoft offers Windows 10 as a free upgrade for computers running a genuine copy of Windows 7 and Windows 8.1. If your PC is running a 32-bit version of Windows 7/8.1, it will keep the 32 bit version of Windows 10 after upgrade. Want to upgrade from a 32 bit to 64 bit version of Windows 10 to get more productivity benefits? It is possible and you do not need to pay for it.
Before getting started
- Switching from 32 bit to 64 bit in Windows 10 is free, so you do not need to pay more. As long as you have a qualifying Windows 7/8 or Windows 10 license, you are entitled to use it.
- There is no direct path to upgrade Windows 10 tablet from 32 bit to 64 bit, so you have to make a clean installation of the operating system. The process will wipe all files, applications and settings.
- Make sure you back up important files beforehand.
- You have to reinstall applications and native 64 bit drivers.
Confirm Windows 10 64-bit is compatible
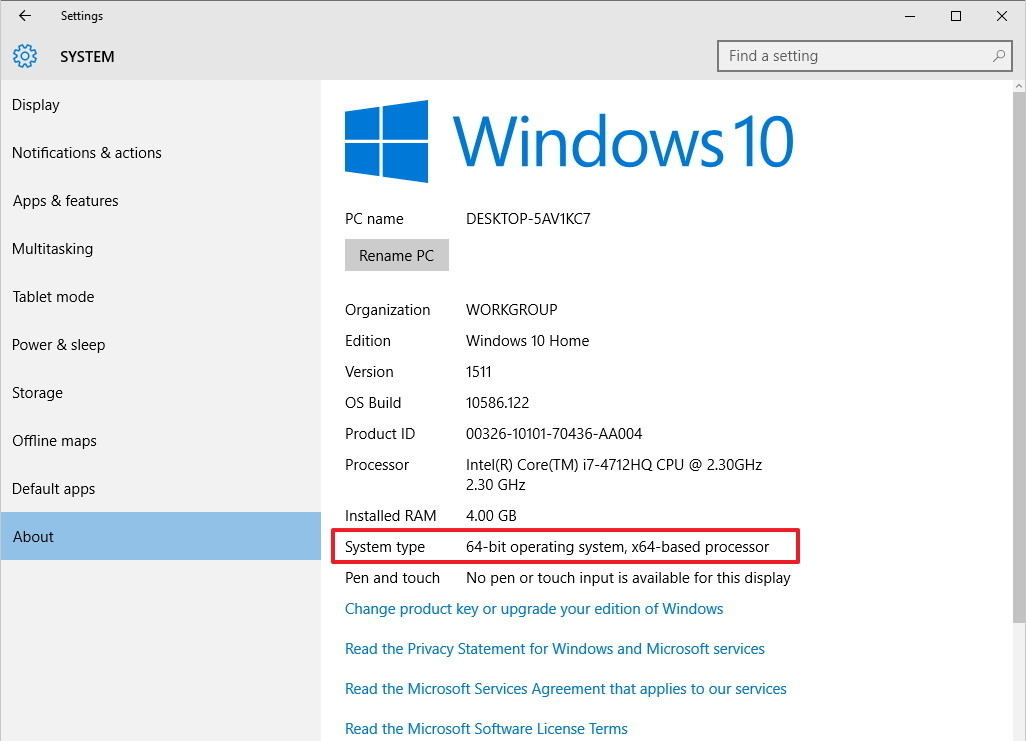
Before upgrading your tablet or PC to Windows 10 64 bit, please check whether it has a 64-bit processor. Head to Settings app on Windows > System > About. In System type there are two pieces of information. If you see "32-bit operating system, x64-based processor", it means that your PC supports Windows 10 (64 bit); instead, if the information is "32-bit operating system, x86-based processor", your system is not capable of upgrading to 64 bit.
Make a backup of your PC
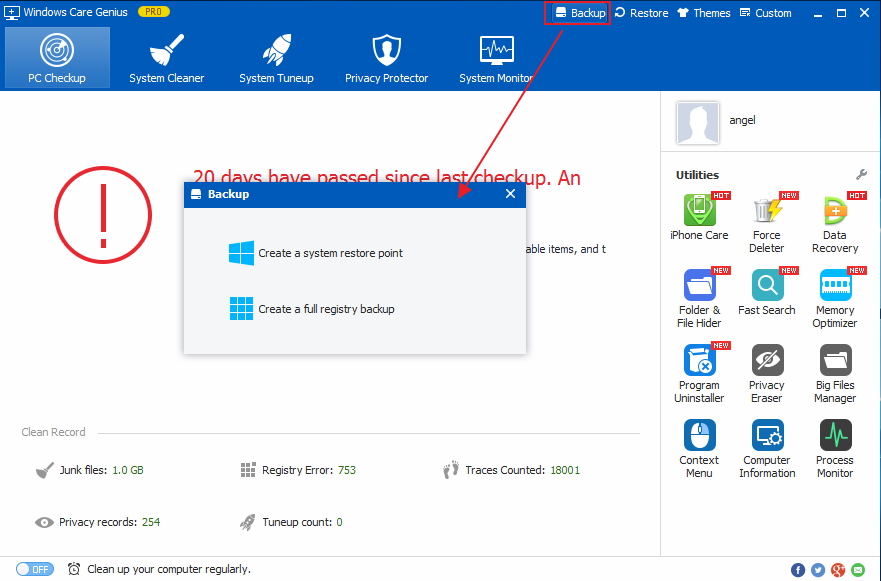
We suggest you back up your important files, photos, music, and other files to an external drive or cloud, as the process will erase all files and settings. You can also use Windows Care Genius to create a system restore point. Click Backup button, you can make a full backup of your system and registry.
Download Windows 10 media creation tool and create bootable copy
To get started, please ensure your exiting Windows 10 license is activated. Navigate to Settings > System > Update & Security > Activation.
Step 1. Download Windows 10 media creation tool, click Download tool now button to install and open the application.
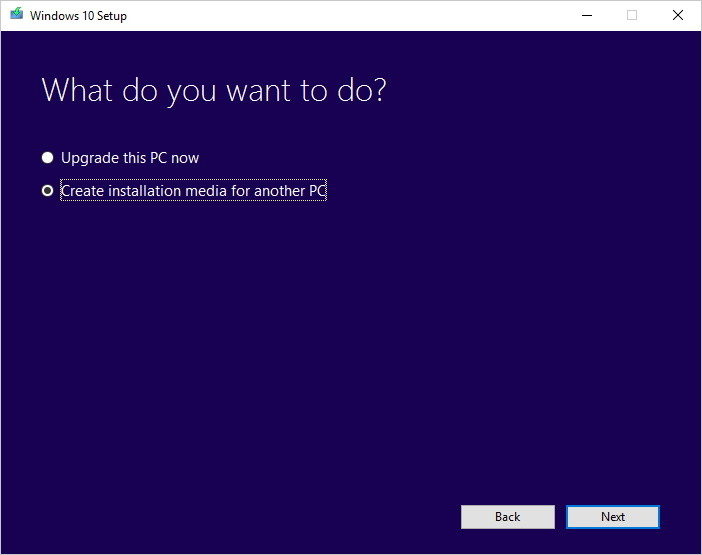
Step 2. Select Create installation media for another PC option in the setup screen.
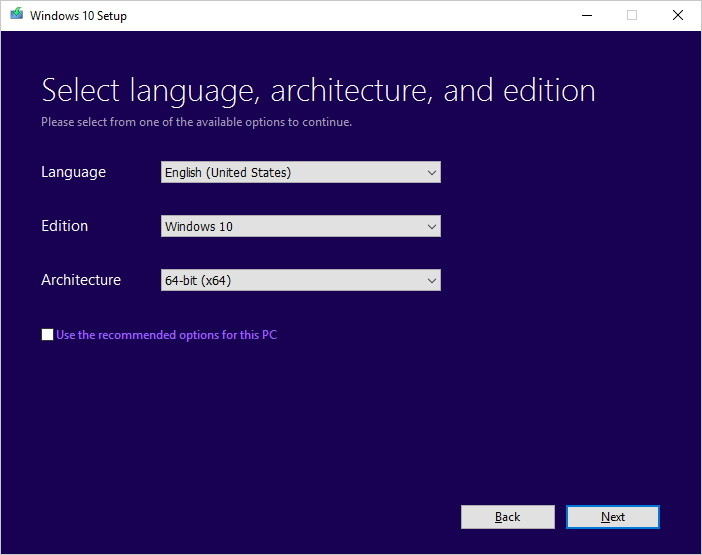
Step 3. Select Language, Edition and Architecture. Please select 64-bit (x64) in Architecture.
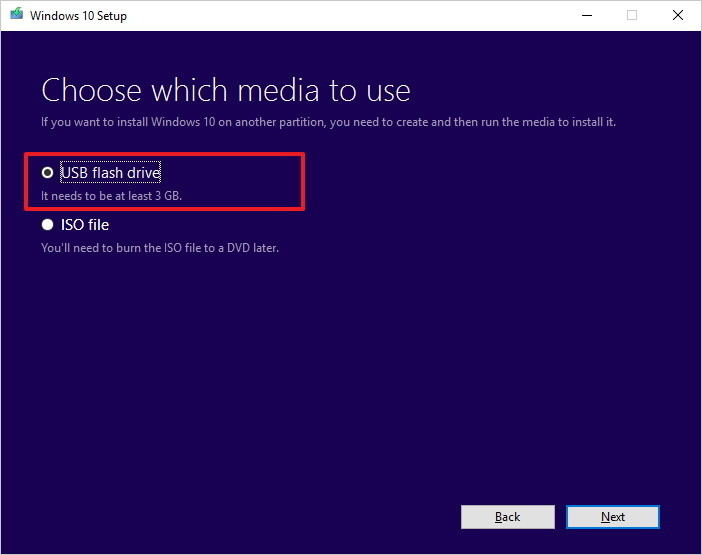
Step 4. Prepare a USB with at least 4GB space and insert it to the table or PC. Choose USB flash drive in setup screen, and follow the steps to complete.
Install Windows 10 with 64-bit processor
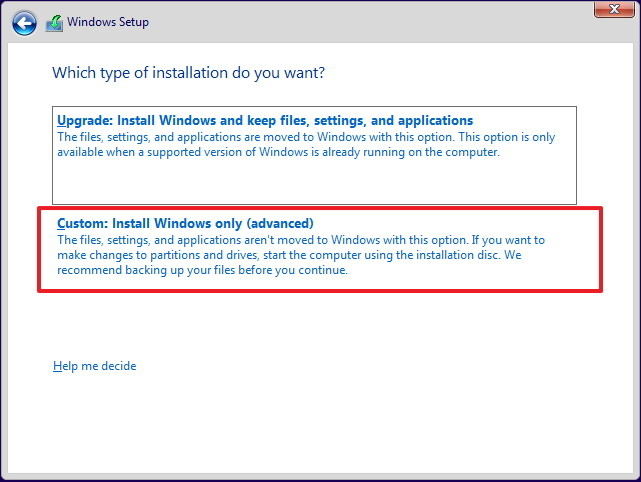
Reboot your tablet/laptop or PC and install Windows 10 64 bit from the media you just created. Click Custom: Install Windows only (advanced) to overwrite the existing 32-bit installation.
Follow the on-screen directions to complete the installation. Last but not least, go to Settings > Update & security > Windows Update to download the latest updates and drivers. If some of the drivers are not available through Windows update, you can go to your computer's manufacturer website to download and install 64-bit version of the driver.
Congratulations, you've just upgraded to Windows 10 64-bit from 32 bit successfully. It is not complicated to switch from 32 bit to 64 bit in Windows 10 tablet, we can handle this by ourselves at home by following the tutorial in this article.
- Related Articles
- Best Way to Speed up A Slow Windows 10 PC
- Locked out of Laptop after Windows 10 Update, How to Change Password
- How to Create a Windows 10 Recovery Drive
