Top 4 Ways to Set Auto Shutdown in Windows 10
Top 4 Methods to Enable Automatic Shutdown in Windows 10
Auto shutdown Windows 10 is a feature built into your Windows 10 PC that allows you to automatically shut down your computer at the specified time. This comes handy when you need to leave your PC but there's a task running on it which will be completed after a certain period say a few hours. Well, you can use the auto shutdown feature and let your PC automatically turn off after the task has finished.
In the following guide, you will learn top four ways for automatic shutdown Windows 10. Each of these methods uses a different utility but accomplishes the same task - that is to turn off your computer automatically.
- Method 1. Set Auto Shutdown via Run
- Method 2. Create a shutdown timer for Windows 10 via CMD
- Method 3. Schedule Shutdown in Windows 10 using Task Scheduler
- Method 4. Set Auto Shutdown in Windows PowerShell
Method 1. Set Auto Shutdown via Run
The more you praise the features of the Run dialog box, the lesser it is. It's more than just a dialog box as it lets you open almost all the utilities on your computer and even allows you to run certain commands to accomplish tasks.
You would be glad to know that the Run dialog box can also be used to auto shutdown your PC. It uses the shutdown timer Windows 10 feature to let you enter a timer for shutting down your computer. Here's how to use it.
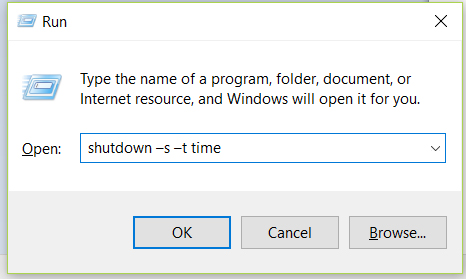
Open the Run dialog box on your PC by pressing the Windows + R key combo. When it opens, enter in the following command and hit Enter.
shutdown –s –t time
In the above command, replace time with the time you want to set in seconds. For example, if you want for your PC to turn off in 60 seconds, replace time with 60, and so on. After the command has executed, your PC will automatically shut down after the specified time has passed.
Method 2. Create a shutdown timer for Windows 10 via CMD
If you are more of a technical person and would prefer using a command prompt window to create an automatic shutdown schedule, this section will help you out.
Command Prompt allows you to execute several commands and one of those commands gives you the ability to auto shutdown your PC. Here's how you can use that command:
Step 1. Press the Windows + X key and select Command Prompt (Admin) to open a command prompt window on your PC.
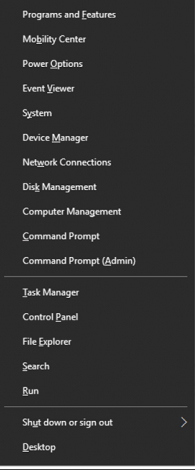
Step 2. When the command prompt window opens, type in the following command and hit Enter. Make sure to replace time with your chosen time in seconds.
shutdown –s –t time
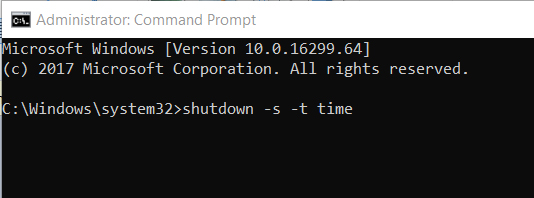
When the specified time has elapsed, your PC will begin to shut down automatically. Ensure you have saved all of your unsaved work or you risk losing it due to the automatic shutdown of your computer.
Method 3. Schedule Shutdown in Windows 10 using Task Scheduler
If you want another way to schedule shutdown Windows 10, then Task Scheduler is there to help you out. What this utility does is it allows you to schedule tasks on your PC including the shutdown task. You can specify several options in the utility and the below is how to open and use the utility to turn off your PC.
Step 1. Press the Windows + R key combo on your keyboard to open the Run dialog box. Type taskschd.msc into the box and hit the Enter key.
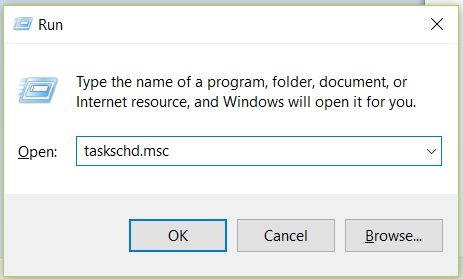
Step 2. When the Task Scheduler utility opens, find the option named Create Basic Task in the right panel and click on it to launch it.
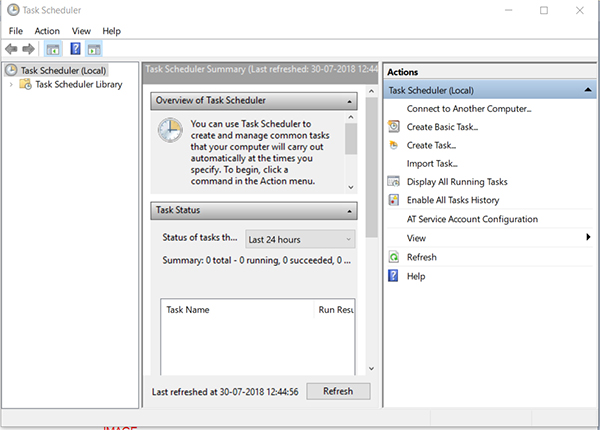
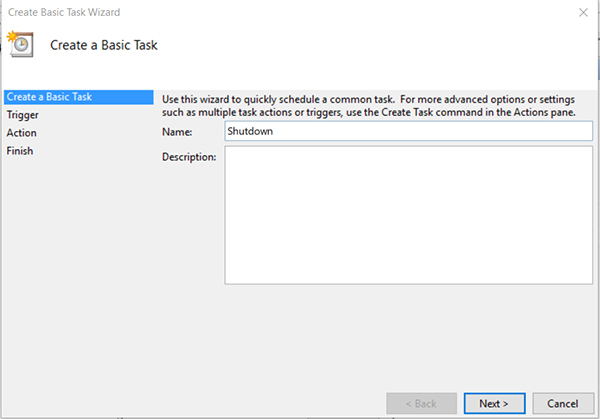
Step 3. You will be asked to enter a name for the task. Enter Shutdown as it's self-explanatory and click on Next to move forward.
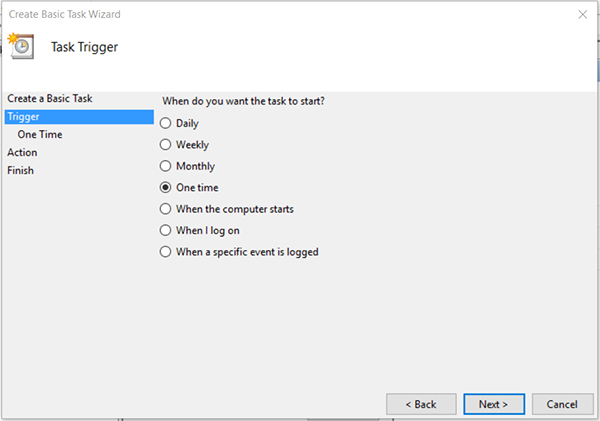
Step 4. On the following screen, choose the repeat frequency of the task. If you want to run the task only once, select One time and hit the Next button.
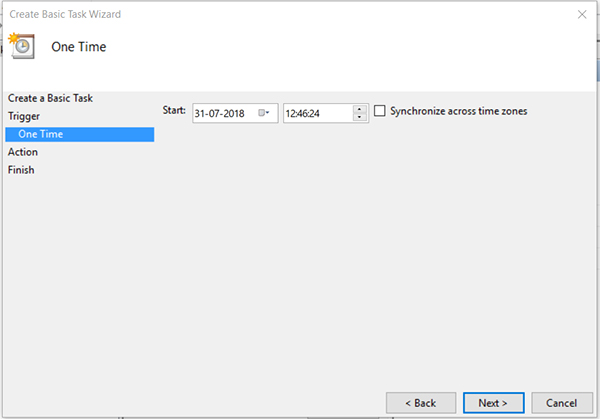
Step 5. On the next screen, use the available dropdown menus to select a date and a time for shut down. Once you have selected, click on the Next button to continue.
Step 6. On the screen that follows, choose the option that says Start a program and click on Next.
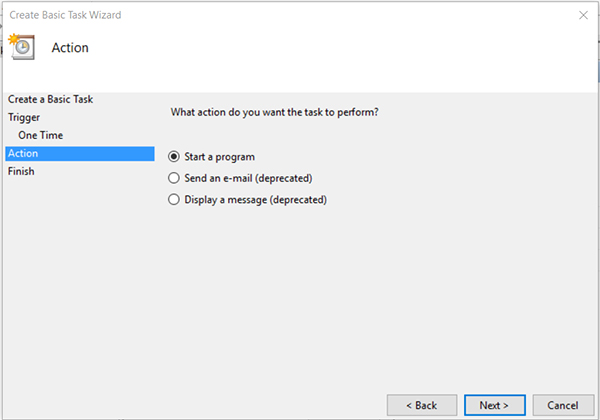
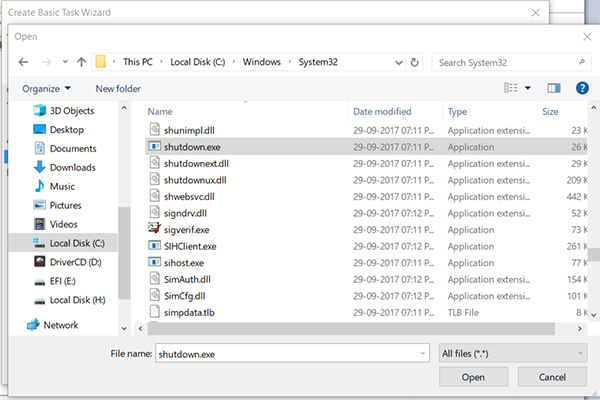
Step 7. Click on the Browse button and head to C:/Windows/system32 and find and double-click on the file named shutdown.
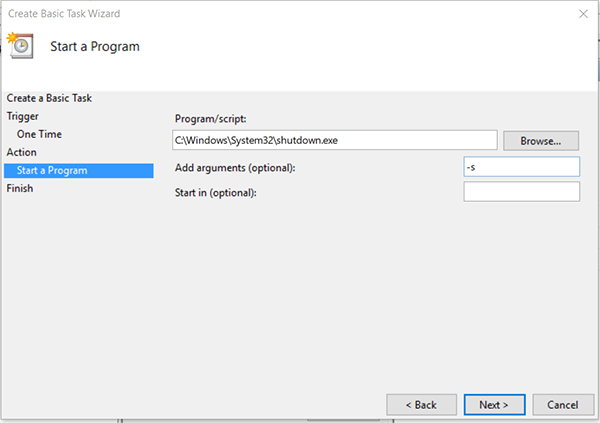
Step 8. In the Add arguments field, enter -s and click on Next.
Step 9. You should now be on the final screen. Review your task and click on Finish.
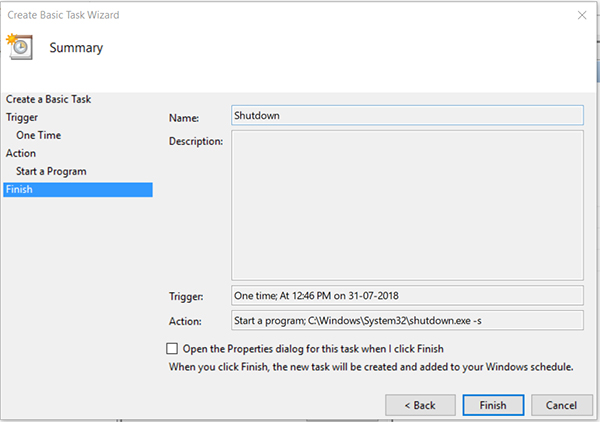
The task will run at the specified time and it will shut down your computer.
Method 4. Set Auto Shutdown in Windows PowerShell
If you are used to the new Windows PowerShell and you would like to use it to auto shutdown your PC, you can do so by following the following instructions.
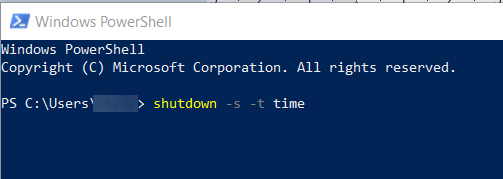
Search for shell in the Start Menu and click on Windows PowerShell when it appears. Type in the command shutdown –s –t time replacing time with seconds and hit Enter. The command will get executed and your PC will shut down when the specified time has passed.
If you have the habit of shutting down your PC, you would remember your user account password as you need to enter it each time you reboot your PC. However, if you don't do it often, you are likely to forget the password for your account. Fortunately, there's a tool called Windows Password Key that allows you to reset the forgotten passwords for your Windows user accounts.
We hope the above guide teaches you how to auto shutdown Windows 10 using four effortless ways and without using any third-party tools. In case you forgot Windows 10 password, Windows Password Key will help you out.
- Reset/Remove Windows admin and other user password for local/domain account.
- Create a new local/domain admin account to unlock your computer.
- Change your Microsoft account password offline.
- Fully support Windows 10/8.1/8/7/Vista/XP, Windows Server 2012 (R2)/2008 (R2)/2003 (R2).
- Related Articles
- 2 Ways to Change Account Type of Users in Windows 10
- Windows 10 Keeps Asking for Login User Password, How to Fix It
- Windows 10 Password is Incorrect, How to Fix it
