3 Easy Ways to Turn On or Off Network Discovery in Windows 10
3 Easy Ways to Turn On or Off Network Discovery in Windows 10
Windows 10 is the latest released series of Windows operating system. The PCs are built to interact with each other or rather connect with each other to become more and more useful. This connectivity is achieved by turning on the network discovery feature of Windows. This article discussed how to turn on/off network discovery in Windows 10.
What is Network Discovery in Windows 10?
Way 1: Turn On or Off Network Discovery in Settings
Way 2: Turn On or Off Network Discovery in Network and Sharing Center
Way 3: Turn On or Off Network Discovery for All Network Profiles using Command Prompt
What is Network Discovery in Windows 10?
As mentioned earlier, Network discovery helps the PC to look for other PCs connected on the same network. Windows 10 has a built-in setting to turn on the network discovery when the PC is connected on a private or home network. The same built-in features turn off the network discovery automatically when they are get connected on public networks. Getting connected on untrustworthy networks has the same later impact. The network discovery is consisting of three different modes such as:
1. ON:
This mode makes the sharing of files over the network easy by making the PCs visible over the shared same network. The PC can be seen to other members of the shared network, and other PCs can be seen to the user too. It makes the printing operations easy and wireless too.
2. OFF:
This state stops the process of network discovery. The user can't see other PCs on the same network while in this mode. Others can also not see the user's PC as well.
3. CUSTOM:
This is a combination of both ON and OFF mode of operation with some tempered settings. This mode let the network discovery, but maybe the firewall settings have been altered by the administrator than before.
Way 1: Turn On or Off Network Discovery in Settings
Network Discovery is redundant when the user only possesses a single PC on a network. So turning it off is an option in those cases. To turn off network discovery windows 10 via settings follow these steps as mentioned:
1. Click on "Start" to launch "Settings".
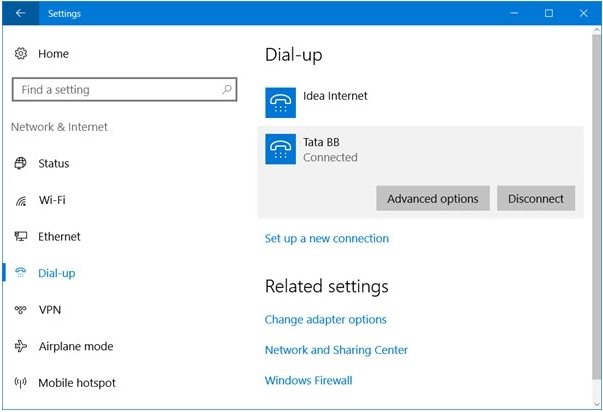
2. In "Settings" locate "Network & Internet" and click on it. Then select Dial-up or Ethernet whichever is the connection being used.
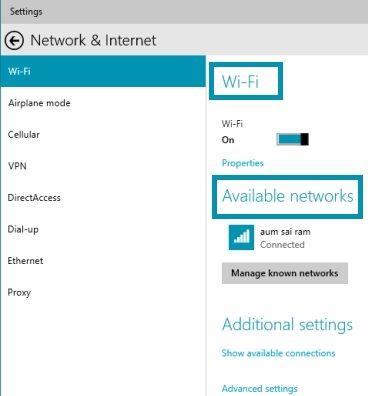
3. Select the proper network connectivity option and then click on "Advanced options."
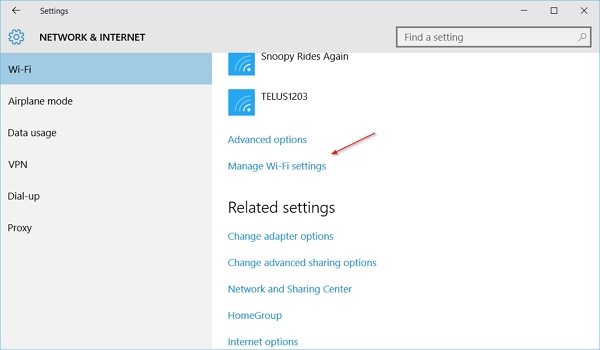
4. If you want to turn the network discovery off, make the slider go to "Off" position to "Make this PC discoverable" option.
5. If you want to turn the network discovery on again, he or she needs to turn the slider to "On" position.
Way 2: Turn On or Off Network Discovery in Network and Sharing Center
Another method of turning the network discovery on or off is by using the Network and Sharing Center. Follow these steps as stated below:
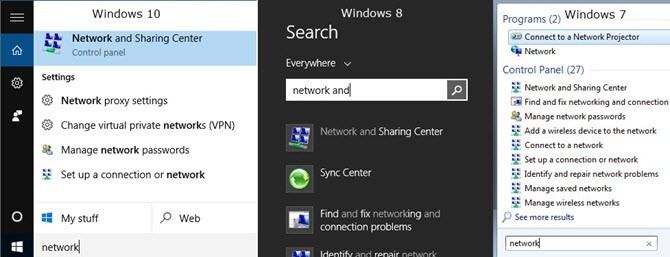
1. Click on the search box.
2. Type in "network" and search.
3. Click on "Network and Sharing Center" from the search results to launch the same.
4. Locate "Change advanced sharing settings" and click on it.
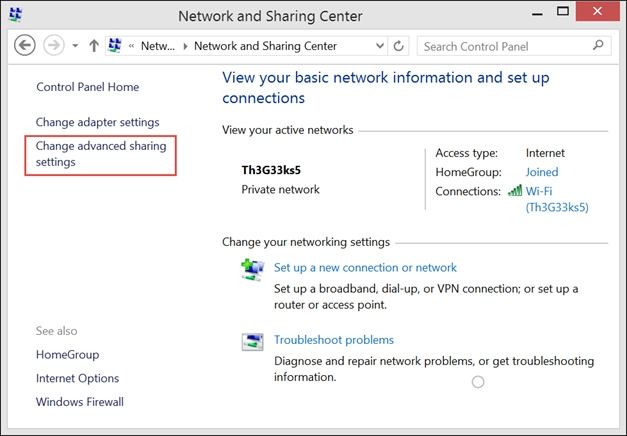
5. Select between the options "Turn on network discovery" and "Turn off network discovery" to make the network discovery go on or off accordingly.
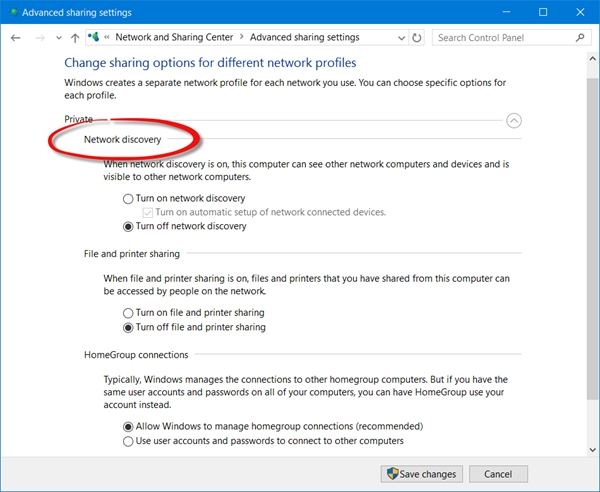
6. Click on "Save changes."
Way 3: Turn On or Off Network Discovery for All Network Profiles using Command Prompt
If a problem like Windows 10 network discovery, not working arises then it can be solved via using the command prompt. Just follow the steps as mentioned below to make the network discovery run again .
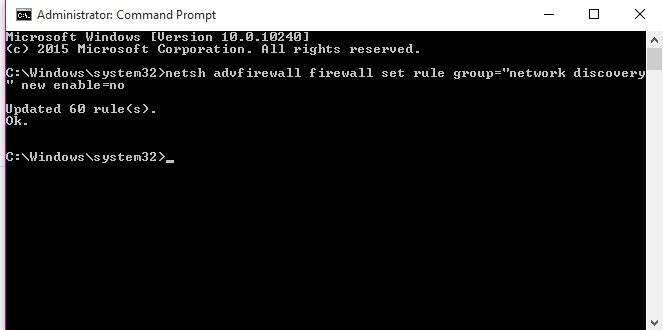
1. Open the elevated Command Prompt by pressing "X" along with Windows key from the keyboard.
2. Now in the command prompt box type in the following command to turn on the network discovery:
"netsh advfirewall firewall set rule group="Network Discovery" new enable=Yes."

3. To turn off the same put in this command in the prompt:
" netsh advfirewall firewall set rule group="Network Discovery" new enable=No"
Except for turning the network discovery on or off, there are other problems like forgetting the password that makes people suffer a lot. But with the use of a simple tool named 4WinKey, it is easy to deal with problems related to the forgotten or lost password of WINDOWS 10 PC.
- Reset/Remove Windows admin and other user password for local/domain account.
- Create a new local/domain admin account to unlock your computer.
- Change your Microsoft account password offline.
- Fully support Windows 10/8.1/8/7/Vista/XP, Windows Server 2012 (R2)/2008 (R2)/2003 (R2).
- Related Articles
- 2 Ways to Change Account Type of Users in Windows 10
- Windows 10 Keeps Asking for Login User Password, How to Fix It
- Windows 10 Password is Incorrect, How to Fix it
