How to Open Task Scheduler and Create Scheduled Task on Windows 10
How to Open Task Scheduler and Create Scheduled Task on Windows 10
Task scheduler is a useful application of Windows PC. However, sadly most people do not know how to create a schedule on task scheduler or how to change, or rather see scheduled task windows 10. This article is written with the objective to educate people on how to open Task Scheduler and create Scheduled Task on Windows 10 proficiently.
- Part 1: 3 Ways to Open Task Scheduler on Windows 10
- Part 2. How to Schedule a Task using Task Scheduler in Windows 10
Part 1: 3 Ways to Open Task Scheduler on Windows 10
The first reader should know how to open the task scheduler in Windows 10. There are best 3 ways discussed in the follow up of this article, so keep on reading.
1. Open Task Scheduler in the Start Menu
To open the Windows task scheduler via the start menu follow these simple steps just as mentioned below.
Step 1. Make a click on the "Start" icon on the monitor. In the Start menu click on "Administrative Tools" to expand it.
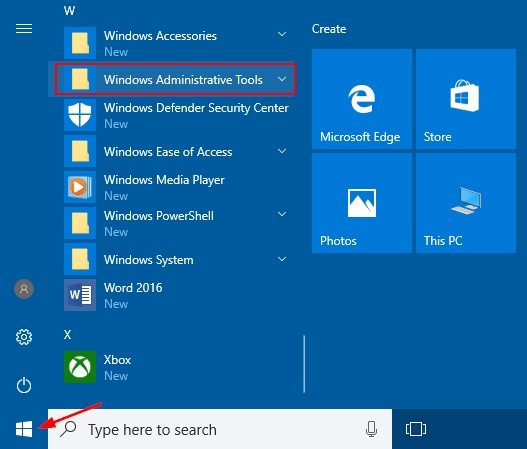
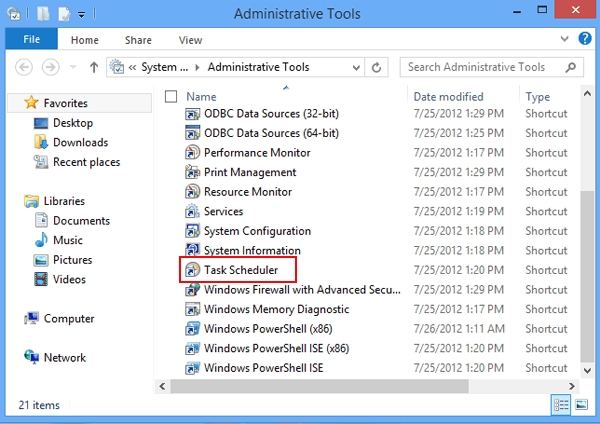
Step 2. From the expanded list locate "Task Scheduler" and click on it.
2. Open Task Scheduler in the Control Panel
Another way to access the task scheduler is via Control Panel. Use these instructions to do so.
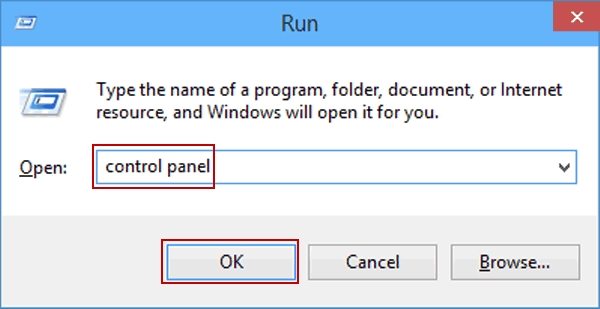
Step 1. Press the "R" button from the keyboard along with the Windows key to launch "Run".
Step 2. In the "Run" box type in "control panel" and press "Enter" from the keyboard or click on "OK" to launch the control panel.
Step 3. Locate the "Administrative Tools" option in the Control Panel and click on it.
Step 4. A new window will come up now. Find out the "Task Scheduler" shortcut from the list. Double click on it to launch the same.

3. Create Task Scheduler Shortcut on Windows 10
A quick and simple way to access the task scheduler is to make a shortcut for the same. The following methods can be used for making a new shortcut named Task Scheduler on the desktop.
Step 1. Make a right click on the free space of the desktop..
Step 2. Point the cursor on the option "New" in the drop-down menu.
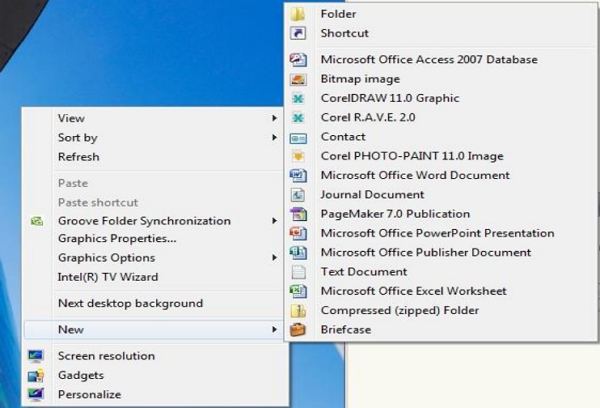
Step 3. Click on "Shortcut" from the popped up menu in the side.
Step 4. A window will now pop up named as "Create Shortcut," in the text field type in the following "%windir%\system32\taskchd.msc" and click on "Next".
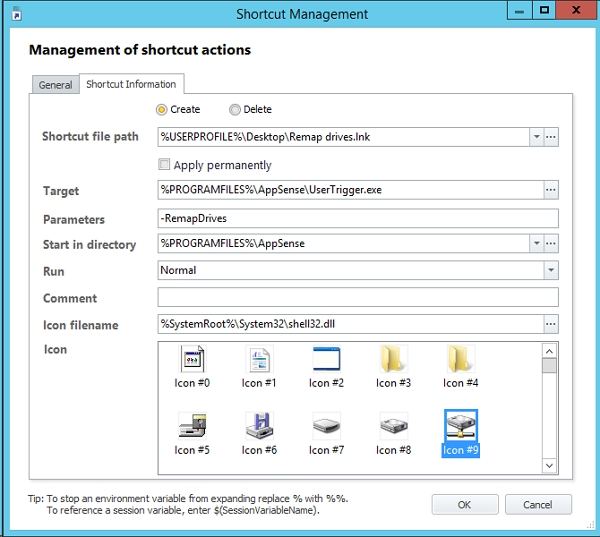
Step 5. In the next Window, you can name the shortcut as "Task Scheduler" and then click on "Finish".
Method 2. Create a shutdown timer for Windows 10 via CMD
How to create a task in the scheduler or to create scheduled task command line is the next thing to be discussed in this article. To use Windows task scheduler command line properly follows these below-mentioned steps.
Step 1. Press "R" from the keyboard along with Windows key to launch "Run."
Step 2. Type in "taskchd.msc" in the text field and click on "OK" to launch the task scheduler.
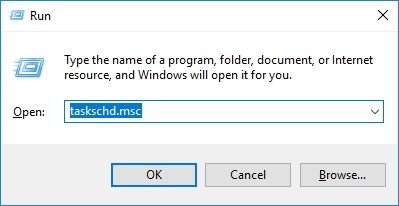
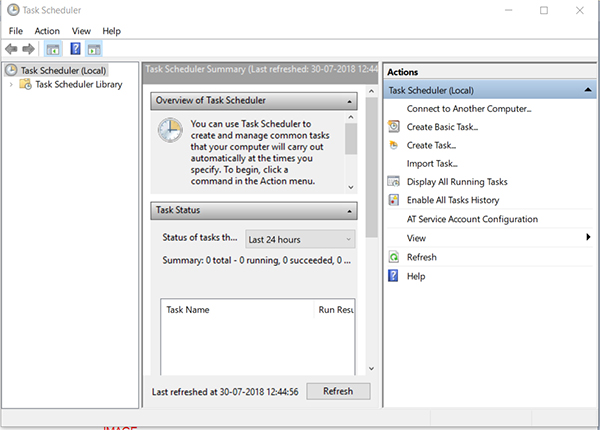
Step 3. On the right side of the task, the scheduler window locates "Create Basic task" and click on it.
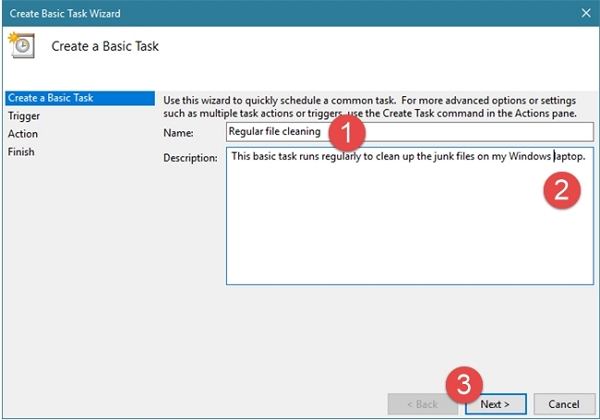
Step 4. Type in the name and description of the task of the task in the window and then click on "Next."
Step 5. Then choose the time for starting the task.
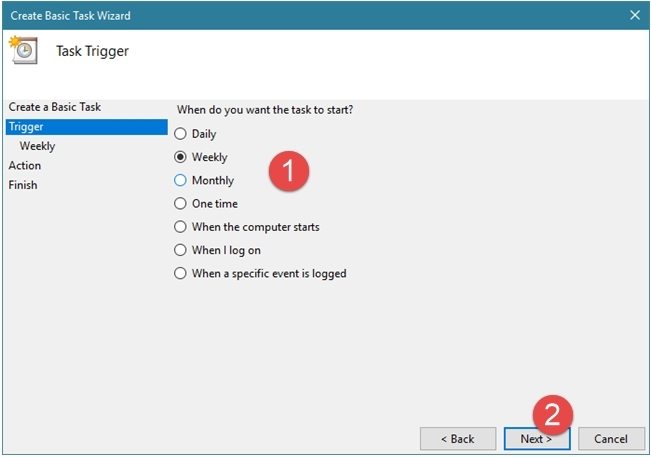
Step 6. The user can select "When I log on" to start the program when he or she logs on to the system.
Step 7. There are three from which the user can select for how he or she wants the scheduler to notify him or her about the task among "Start a program," "Send an e-mail" or "Display a message."
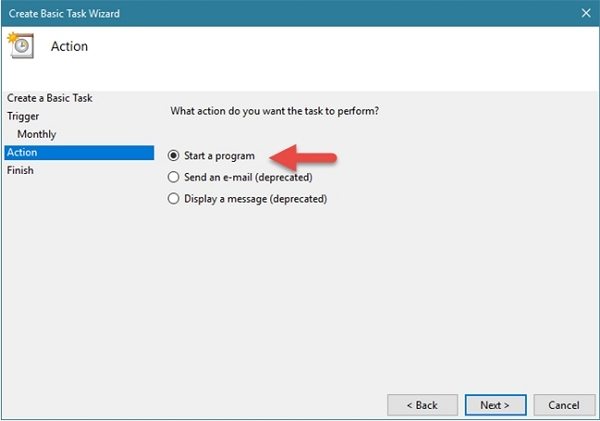
Step 8. Select the desired method of notification. In the case of "Start a program" option user need to browse through the program to be run for the notification.
Step 9. Now click on "Finish" to set the task scheduler in operation for the task.
Step 10. The user can always edit or manage the created tasks by visiting the "Task Scheduler Library."
Hence, this was all about Windows task scheduler in the PC. But there are other problems like forgetting the password. But with the use of a simple tool named Windows Password Key , one can easily deal with problems related to forgot Windows 10 password.
- Reset/Remove Windows admin and other user password for local/domain account.
- Create a new local/domain admin account to unlock your computer.
- Change your Microsoft account password offline.
- Fully support Windows 10/8.1/8/7/Vista/XP, Windows Server 2012 (R2)/2008 (R2)/2003 (R2).
- Related Articles
- How to Disable Windows 10 Lock Screen
- The Top 3 Methods to Back Up Windows 10 PC
- How to Remove Eye Symbol from Password Field in Windows 10
