3 Easy Way to Repair Windows 10 UEFI/EFI Bootloader
3 Easy Way to Repair Windows 10 UEFI/EFI Bootloader
UEFI or Unified Extensible Firmware Interface is a feature of PC which works as a software interface between the operating system and the platform firmware. But this interface sometime creates annoying booting problems as problem of bootloader. This article will tell 3 ways to repair Windows 10 bootloader with ease.
- 1. Fix Windows 10 Bootloader with Automatic Repair
- 2. Repair Windows 10 Bootloader with diskpart
- 3. Repair Windows 10 UEFI/EFI Bootloader with Windows Boot Genius
1. Fix Windows 10 Bootloader with Automatic Repair
The first method to repair Windows 10 UEFI bootloader is through automatic repair. This is an in-built feature of Windows 10 disc which can help to repair EFI bootloader windows 10. To use this method, Windows setup CD/DVD or a USB is required. Follow the below mentioned instructions to fix Windows 10 bootloader through automatic repair method.
• First insert the Windows 10 installation disc or USB to the PC.
• Then restart the PC and boot it from the Windows 10 installation disc or the USB.
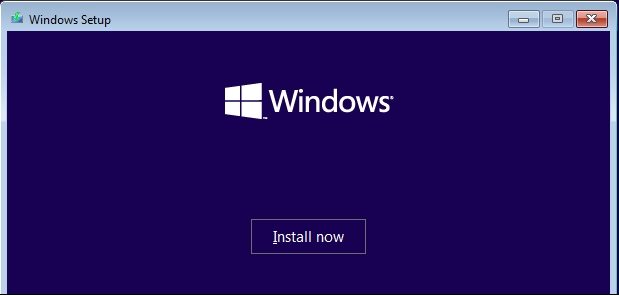
• When the "Install Now" screen appears on the monitor click on the "Repair your computer" option.
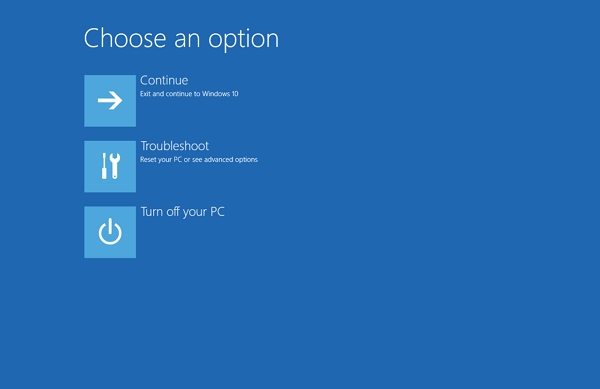
• Then "Choose an option" screen will pop up; there select "Troubleshoot" option from the listings.
• Then click on the "Automatic Repair" option.
• At the "Automatic Repair" screen the PC will ask for an account from the given list to for continuing the process.
• After selecting the desired account wait for a while until the process is completed. And hence the bootloader will be fixed.
2. Repair Windows 10 Bootloader with diskpart
Using the diskpart method is proved one of the most effective ways to deal with bootloader problems. If automatic repair doesn't work then this one is the next thing to try. Diskpart can be also used on the first go as it is assured to be more efficient than automatic repair method.
Generally bootloader problems arise due to the fact that sometimes the UEFI partition of the PC won't possesses an assigned drive letter. This is the most basic cause of bootloader failure. The usual solution is to assign a letter to the unassigned drives via using the diskpart utility which is present on the Windows 10 recovery disc or USB flash drive. This method also asks for the windows setup CD/DVD or USB. To fix the bootloader of Windows 10 operating system through diskpart follow these steps as mentioned below.
• Put the Windows 10 setup CD/DVD or USB in the PC. Restart the PC and boot it from the Windows 10 setup CD/DVD or USB.
• When "Install now" screen pops up select "Repair your computer" option or simply press "R" from the keyboard.
• Then select the "Troubleshoot" alternative from the listings.

• Then click on the "Advance options" choice.
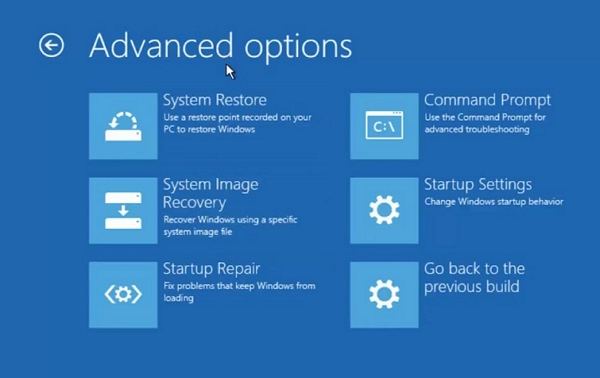
• From the listings choose "Command Prompt" to launch it. When the command prompt window pops up then you need to type in the following commands and hit enter each time.
diskpart
DISKPART>
sel disk 0
• After getting the confirmation message "Disk 0 is now the selected disk" , type in "list vol".
• Again press "Enter" from the keyboard. Now the diskpart will display all the list of volumes present on the PC.

• Locate the required UEFI one from the given list of volumes. The right one will have "BOOT" shown on its Label column and "System" on the Info column. The Fs column if shown then it will show FAT32 format.
• Let us suppose that the UEFI partition is present on volume 2, type in "sel vol 2" in the command prompt and press "Enter" from the keyboard.
• Then use the following command to assign a letter to the drive "assign letter =G:" do not use the letter which is already in use for other drives such as C:\ or D:\
• Now again press "Enter" from the keyboard and then stop for the confirmation message to come up on the screen as :
"Diskpart successfully assigned the drive letter or mount point." Now type in the following commands and hit enter each time.
exit
cd /d G:\EFI\Microsoft\Boot\
cd /d G:\Boot\ or cd /d G:\ESD\Windows\EFI\Microsoft\Boot\
Note: The letter "G" in this command may change depending on what name is used by the user to assign to the drive.
bootrec /fixboot
ren BCD BCD.bak
bcdboot C:\Windows /l en-us /s x: /f ALL Note: c:\ is the drive where Windows 10/8.1/8 is installed on.
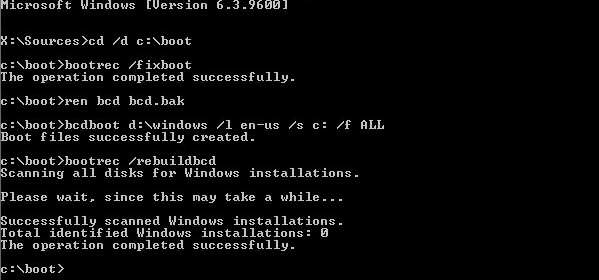
• The C:\ used in the command is to specify the drive where the Windows 10 is installed.
• After typing the command press "Enter" from the keyboard.
• As an alternative to the big command mentioned in the previous step use can use the below mentioned command also to reconstruct the BCD data:
"bootrec /recbuildbcd"
• Press "Enter" from the keyboard.
• After the BCD data is built type "exit" in the command prompt to close it.
• Then restart the PC. Windows 10 should now boot normally again.
3. Repair Windows 10 UEFI/EFI Bootloader with Windows Boot Genius
The 3rd way to fix the bootloader is via using windows rescue in Windows Boot Genius.Windows Boot Genius is the software which can help the user in many booting problems. It can easily resolve the bootloader problem. User just needs to follow the below mentioned steps.
• Download Windows Boot Genius and launch it.
• Put an empty CD or USB into a workable computer. Click on "Burn" to create a bootable CD or USB.
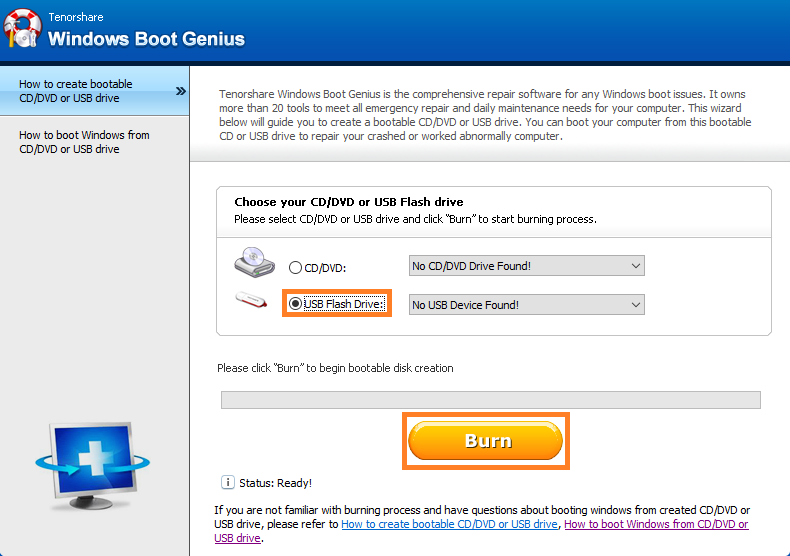
• Insert the bootable CD or USB to the problematic PC and press F12 key from the keyboard to access the Boot Menu. Select the CD or USB as the first boot device. The key may change according to the mainboard of the PC.
• After successful entry into WinPE environment, user will see the icon of Windows Boot Genius. Launch Windows Boot Genius to get into Windows Rescue mode to repair Windows 10 UEFI/EFI bootloader under the "Crash before loading" instruction.
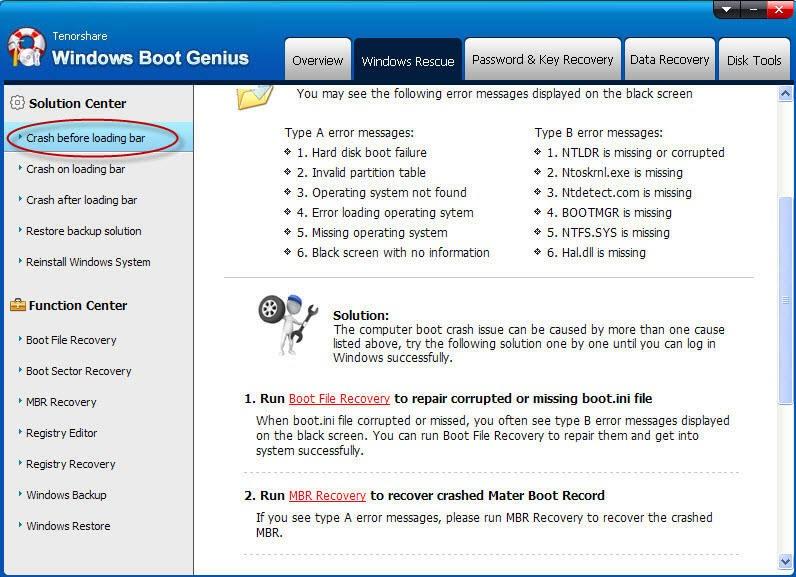
That's all about how to repair Windows 10 UEFI/EFI Bootloader. If you don't have much professional skills on Windows system, Windows Boot Genius may be a better choice for you.
- Related Articles
- How to Disable Windows 10 Lock Screen
- The Top 3 Methods to Back Up Windows 10 PC
- How to Remove Eye Symbol from Password Field in Windows 10
